|
I like to watch videos on YouTube -- sometimes for education, sometimes for fun, but oftentimes for both. As I started in chip carving, I searched around YouTube for videos of chip carving: teaching, demonstrations, anything. The amount of content overall was pretty slim, and several videos fancying themselves as instructional didn't really seem to know what they were doing. I've never had much interest in being just another guy posting my own thoughts on the internet (it surely doesn't need any more of that), but there seemed to be an actual lack of content regarding chip carving available to watch and learn. So I decided to start up a channel for just that purpose. Now, I'm not here to make money. I'm primarily here to chip carve, but I do enjoy the teaching side of things as well. (I'm a certified instructor and have taught formal classes.) While I don't plan to make this any full-time gig, I do want to add to the body of information available online in a meaningful way. My videos are pretty informal with no fancy set-up, effects, or editing. I try to do everything in a single take and upload straight from memory card to the computer, but sometimes a little clean-up is necessary. To start, most of my videos will be in one of three categories:
Whether you're a carver or not, I hope there's something you'll find interesting about this new channel. And if you are a chip carver, I think you'll be able to learn some things too. So check it out... 
0 Comments
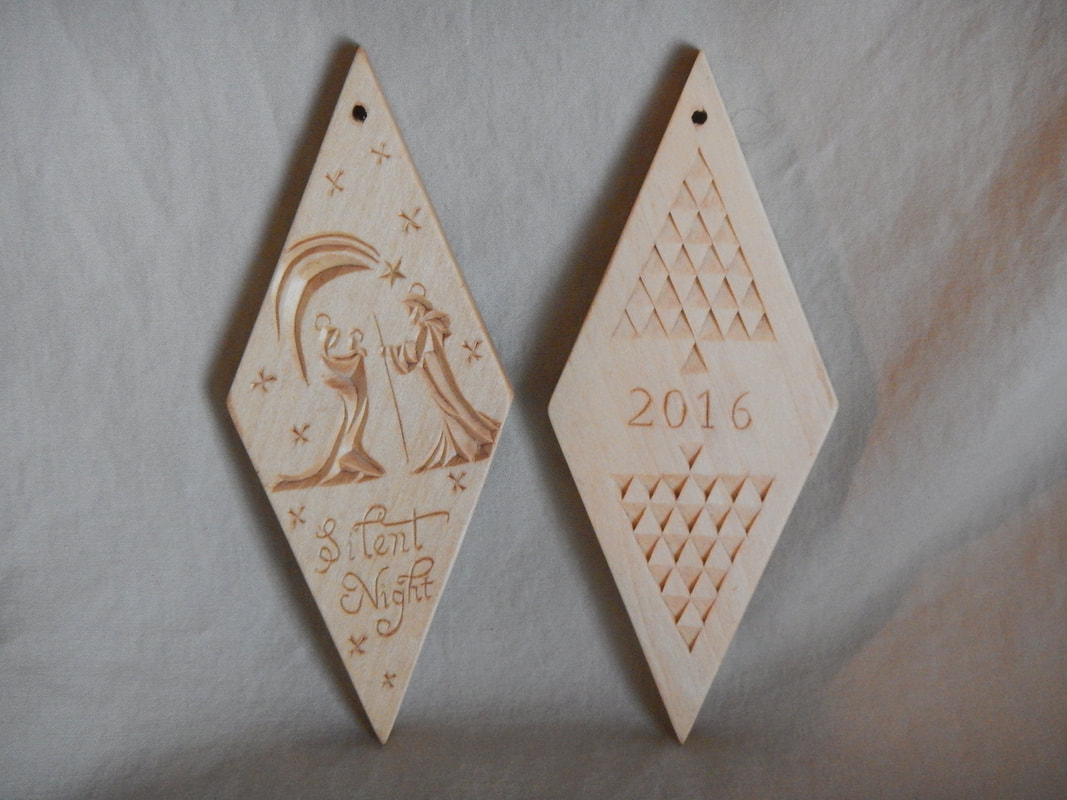
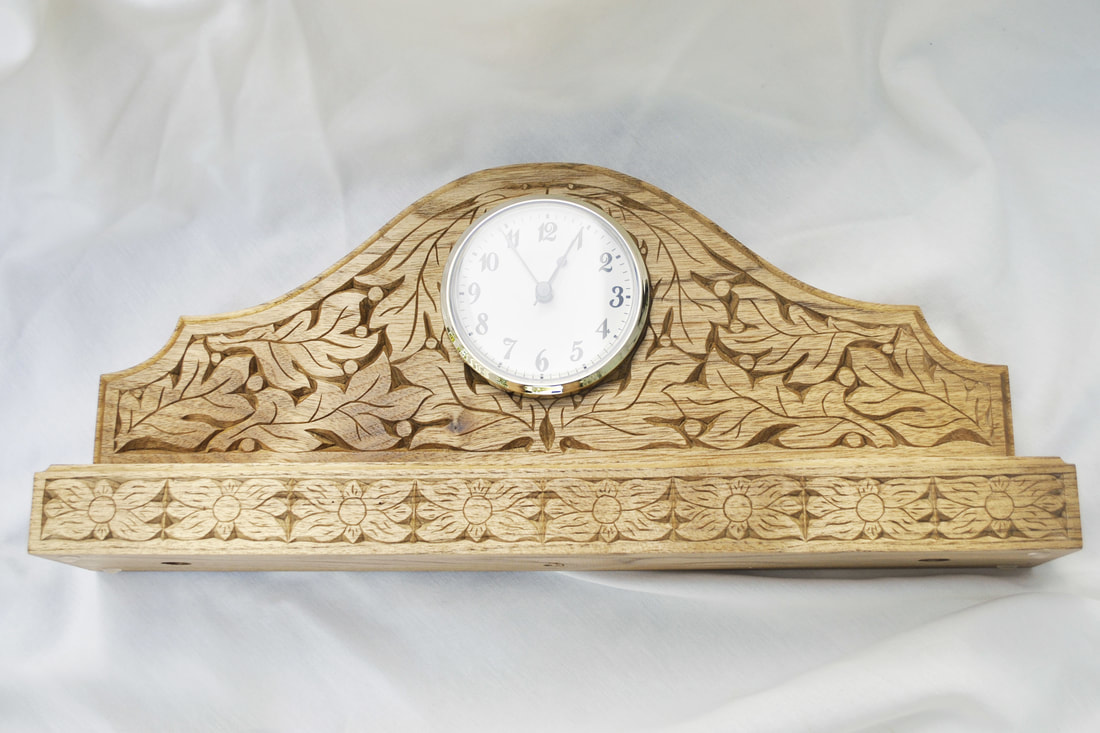
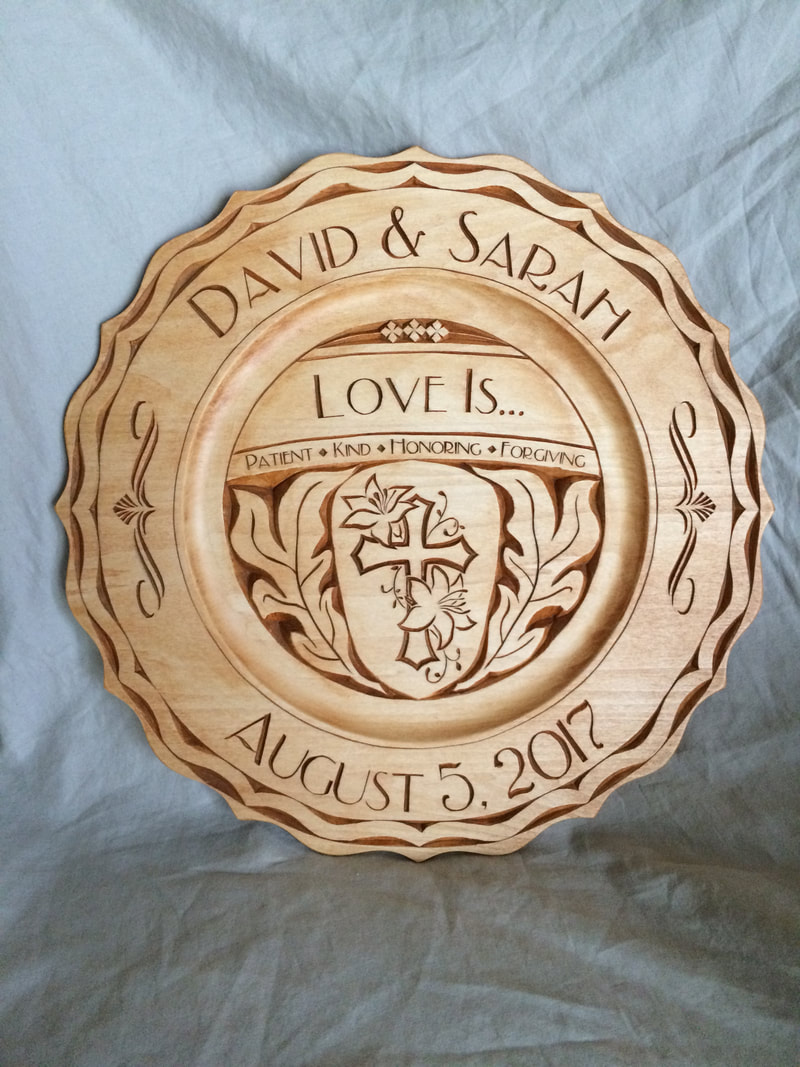
I think it's probably pretty commonplace to have personalized plates given as gifts for weddings. A quick internet search will turn up no shortage of various wedding plates, both carved and other forms. And while I've certainly made my fair share of carved wedding plates, I've also made a variety of other commemorative items. So I figured I'd share some samples of these. This was the first wedding plate I did that was truly my own design. It was actually the second version of it, as the first one incorporated some borrowed elements with my own. 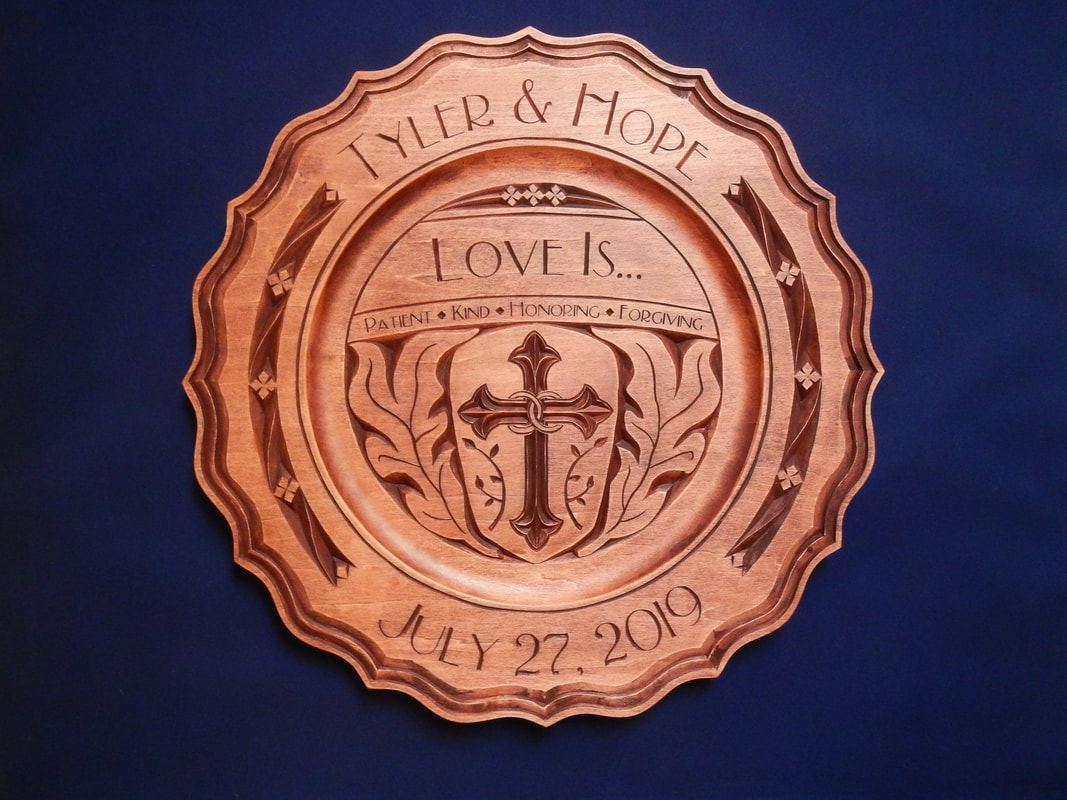 Here's the corollary: an anniversary plate. It was done for a fellow carving friend. It was my first award for carving. 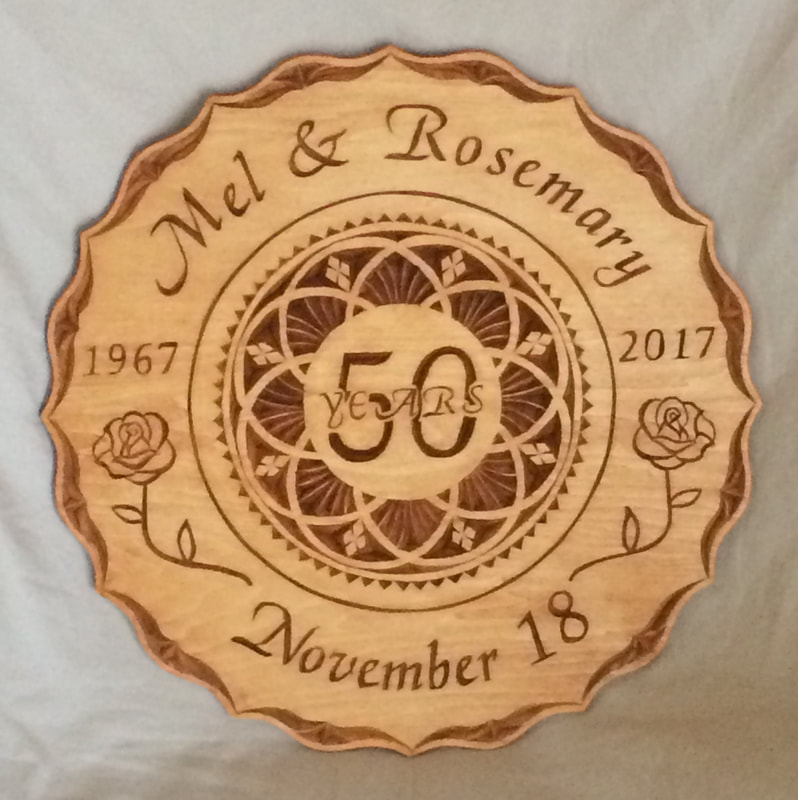 Keeping on the theme of wedding plates, kinda. This time with a clock included. (Technically, he commissioned this for the anniversary of when they started dating, but it works the same as a wedding plate.) 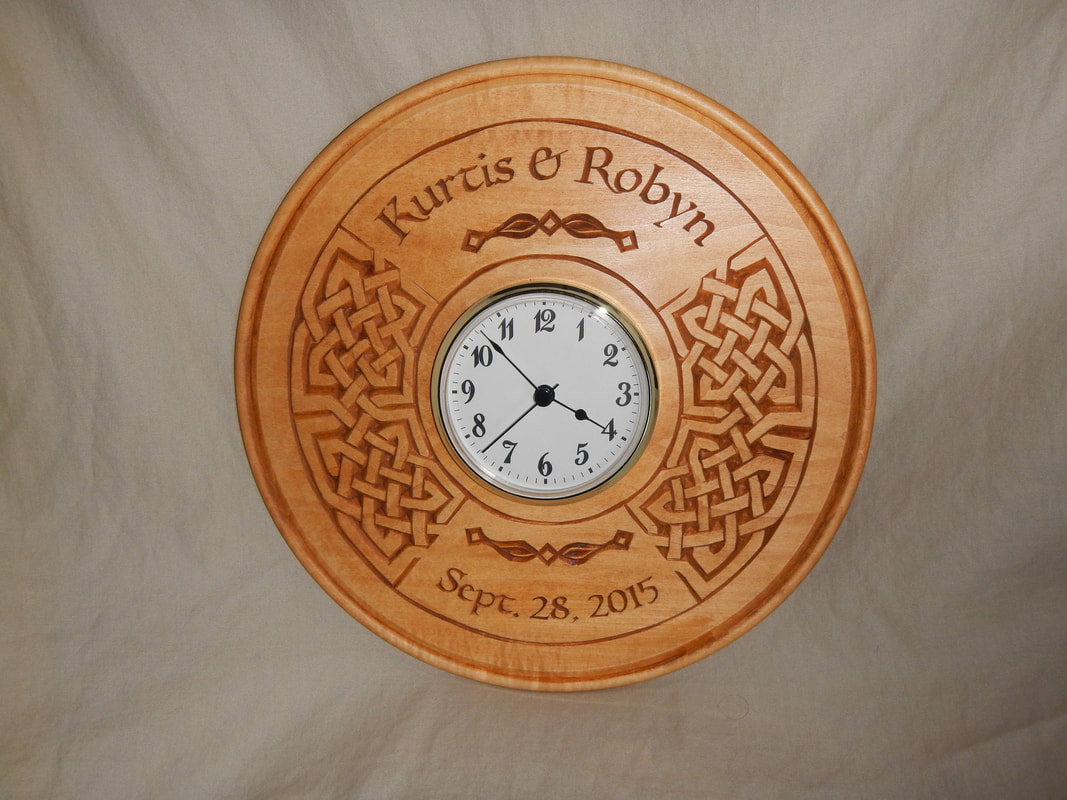 One more for weddings. This one was commissioned by a couple of friends, and they specifically wanted a box for their friends' wedding. It was a new idea for me, so that combined with their lower budget produced this simpler design. I showed them the design in just the line version of the pattern, and they didn't care too much for the rosette. Once I created the coloured version to suggest how it would look carved and stained, they changed their minds. 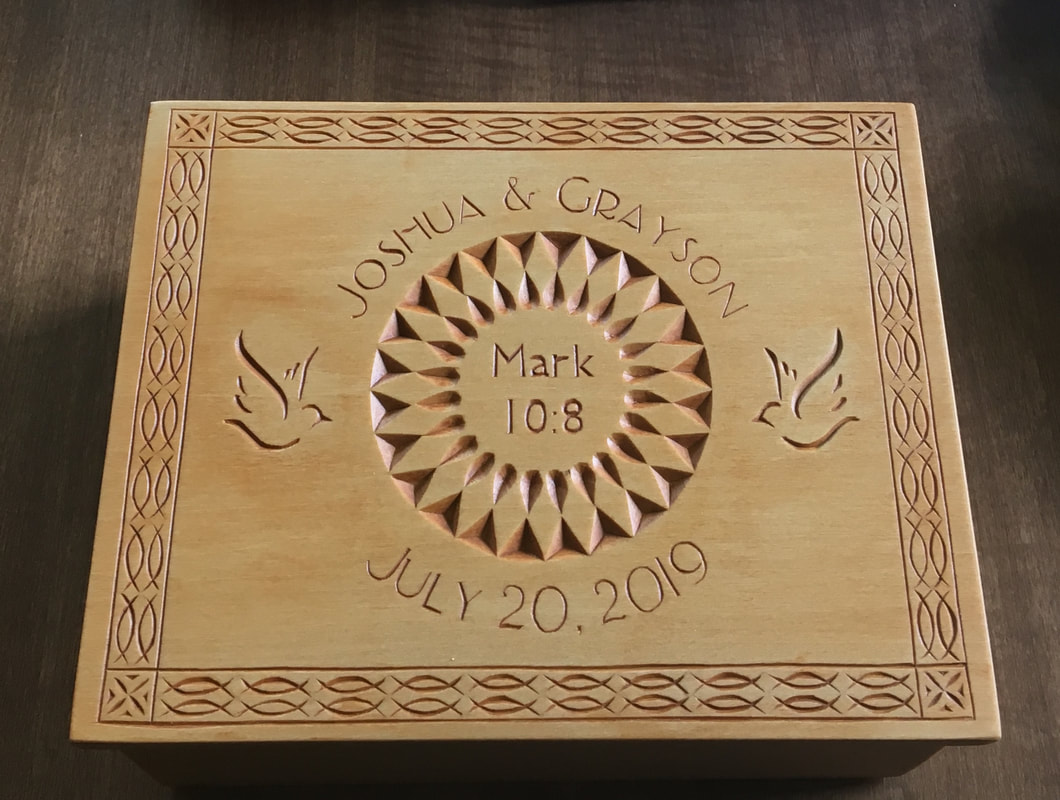 Another box for another type of new beginning: baby birth. While it's obviously just a generically monogrammed box, it was given to a friend to commemorate the birth of their baby. Our intention in giving was to store baby keepsake kind of things, but I guess the actual use is up to them. 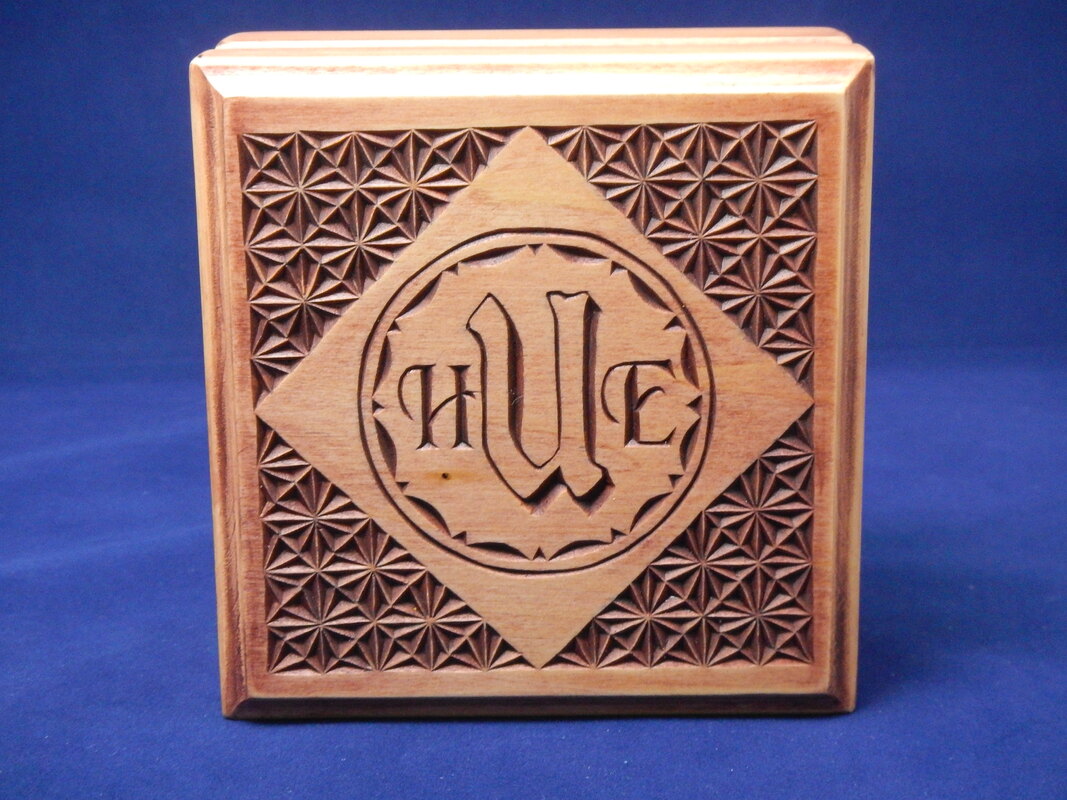 Another commission from a friend for his own grandchild's birth. The other side of this Christmas ornament has a nativity scene on it, but I've only included the personalized side here. 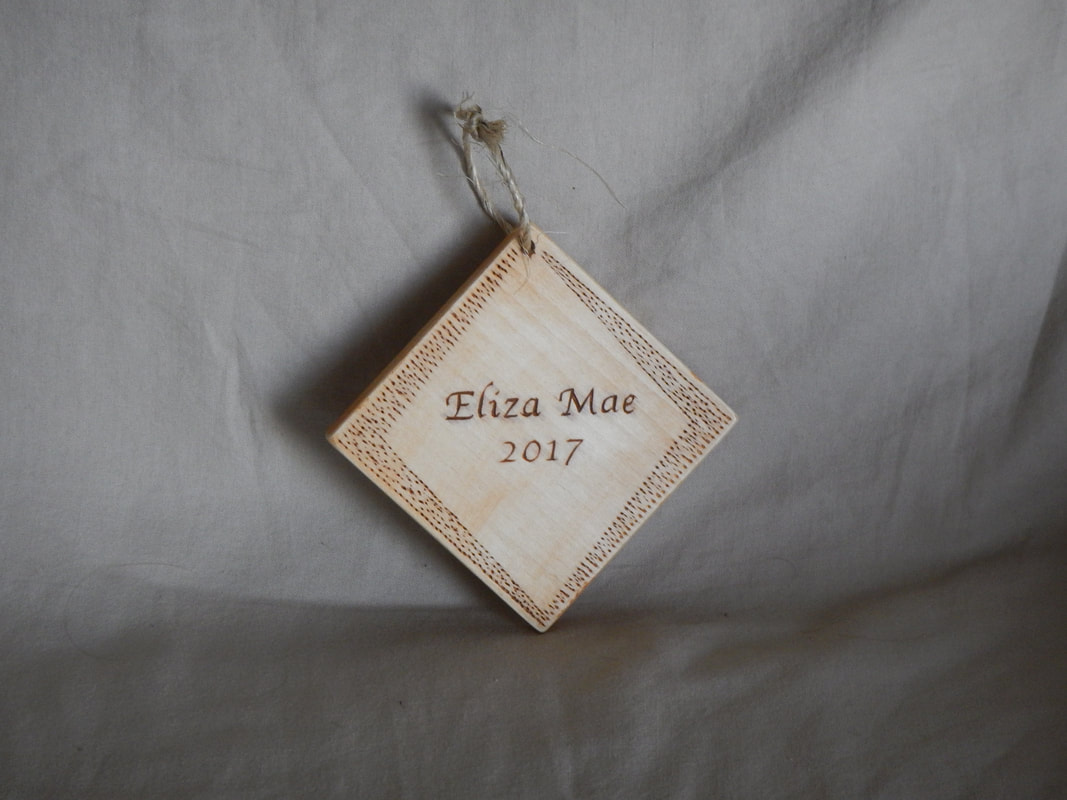 The last baby-related item is a picture frame. The design was directly inspired by this entryway in the home of some of our family. 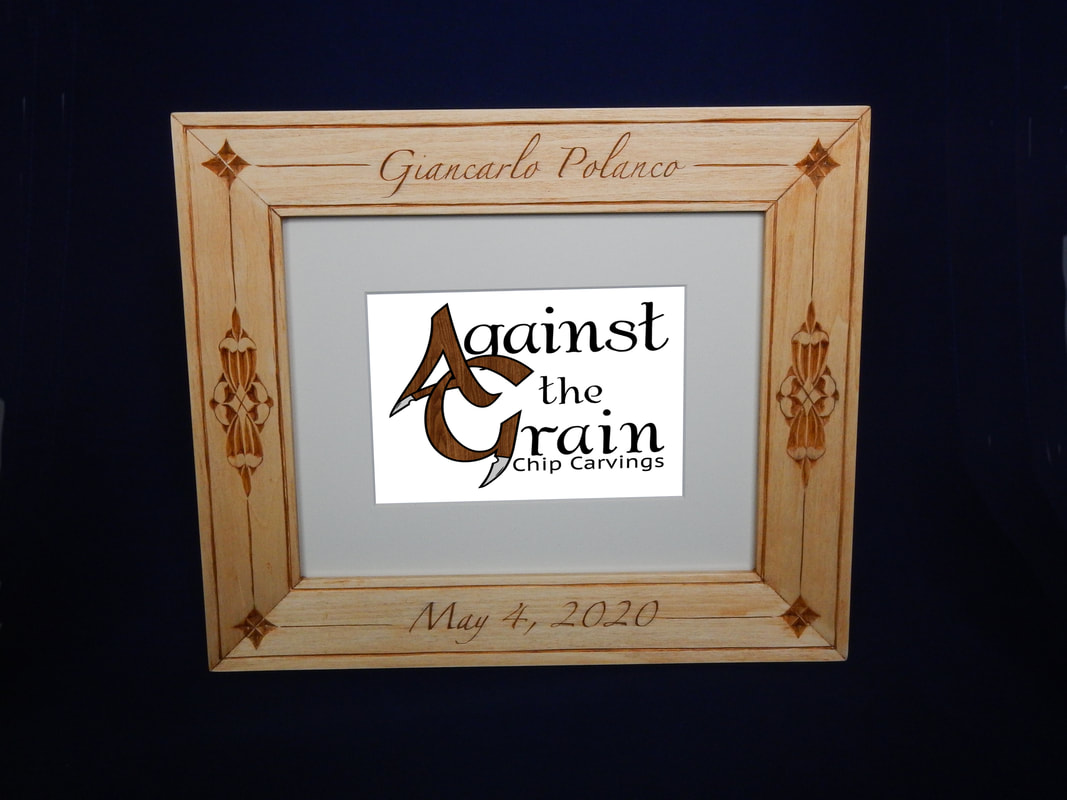 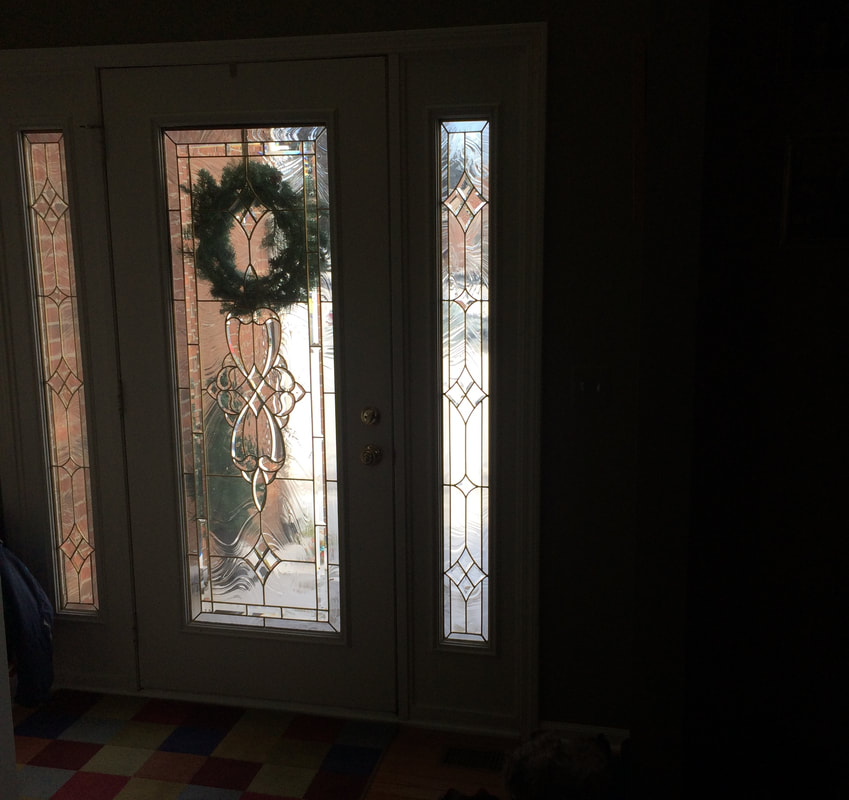 From birth to death. I carved this to be hung in a local library for the man who led the carving club there. 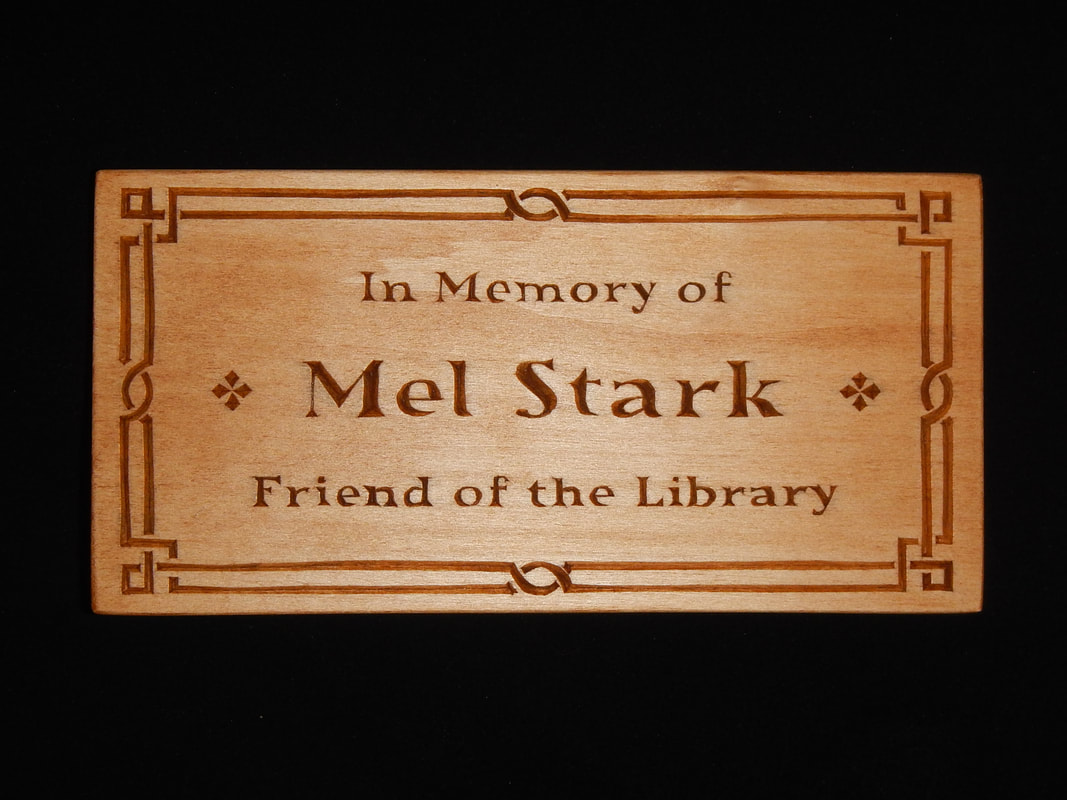 This one was for a little boy who was going through cancer treatment. You can read more about Beads of Courage here, but they're given to encourage children battling serious illness. This was done in collaboration with Marty of My Chip Carving. He provided the box, and I provided the carving. 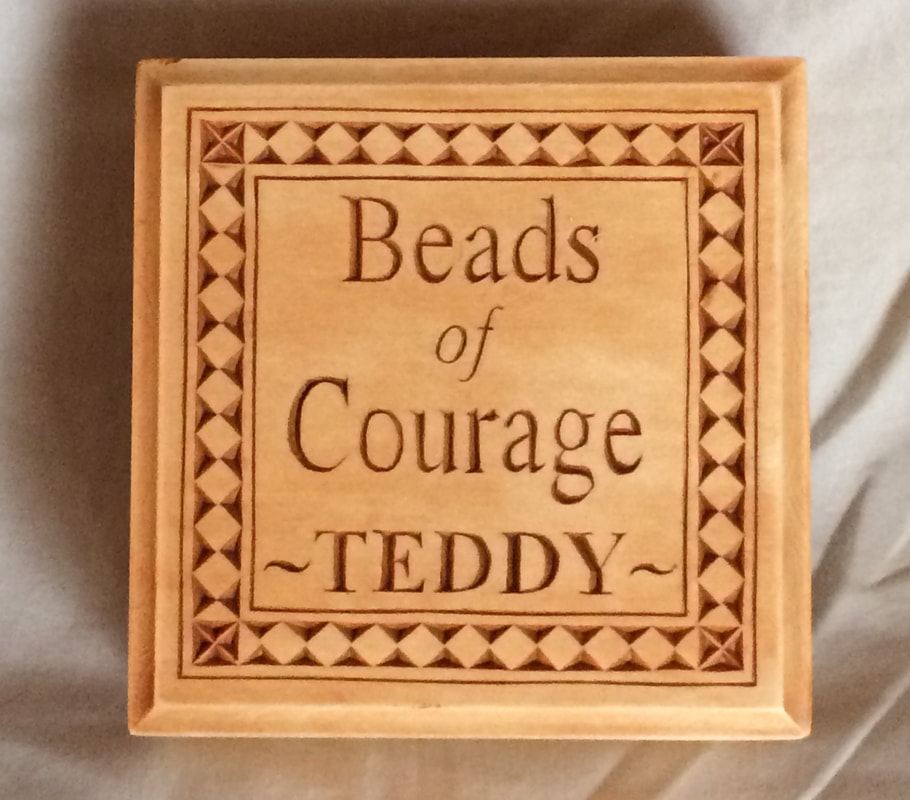 This last one isn't really in commemoration of anything, per se, but it was a personalized piece that was unique to design. It's a sign to be hung outside an RV while camping. So it's one of the larger projects I've done, but also one of the thickest pieces of wood and required a new type of finish to hold up outdoors year after year. It took a while to design a pine tree image that was chip carvable and looked clearly like a pine tree. 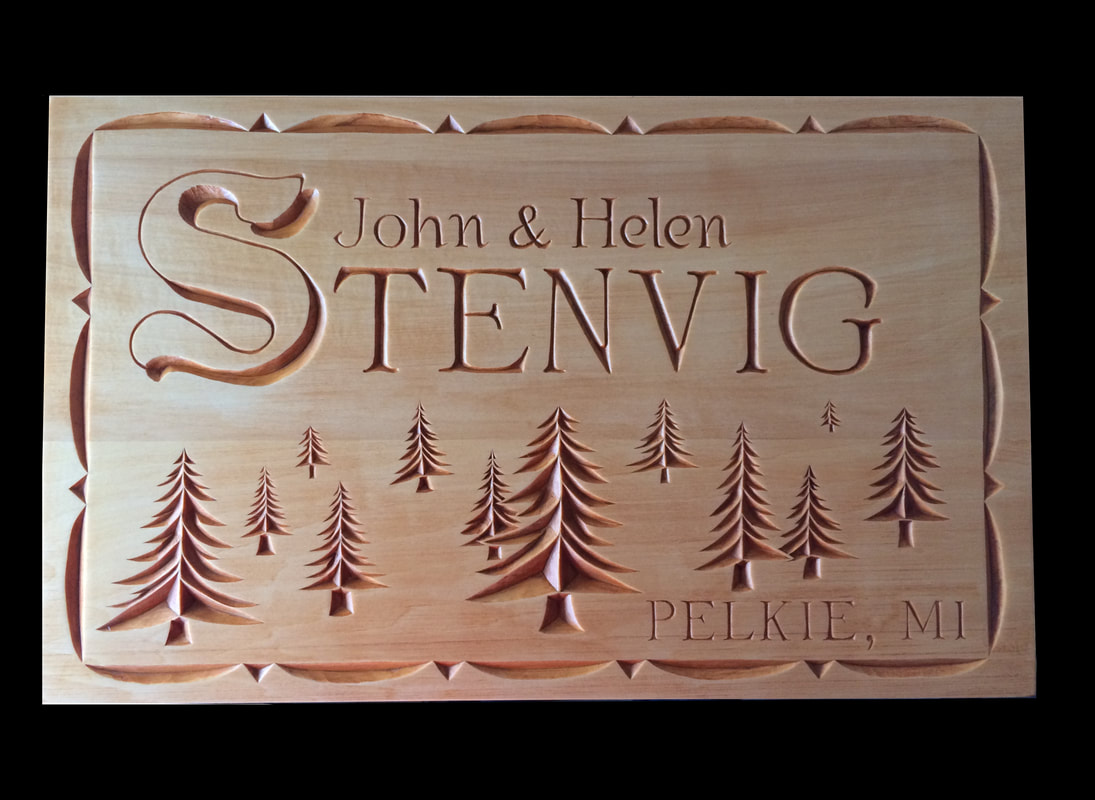 I've always loved logos and wished I had some kind of company that I could design and own one for. Then in 2015, I started selling my chip carvings and called it Against the Grain Chip Carvings. It was all done in somewhat short notice, though, so I wasn't able to take the time I really wanted to put together a great logo, and I was never satisfied with the logotype I came up with, but it was good enough to generally brand myself. My original logotype. Now, after four years or so, I put myself to actually creating a logo I liked. One of my goals was to include an actual logo, a quick visual symbol rather than the words all typed out. One natural answer is a stylized single letter for the company name, but with the name Against the Grain, there was no single letter that can really do the job. So I tried various things with fusing an A and a G because in different fonts they can be like mirror images of each other, but nothing ever looked great. It was either not stylized enough to look good or was too stylized to even be clear. I also tried my hand at more abstract logos, but that's outside of my strengths, and I wanted something that was more symbolic of my work with wood and knives anyway. I finally figured out to try incorporating a chip carving knife directly into the A and G letters. 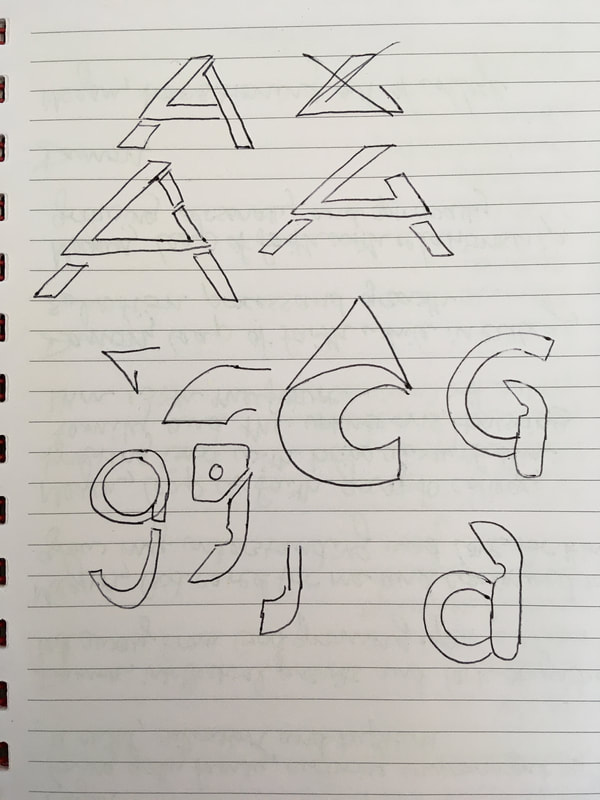 The early process was not pretty Realizing that this was about as far as I could go by hand, I did what I usually do and took to the computer for the real work. I found a font that was suitable: it was stylized enough to be recognizable branding, but clean enough to be easily readable; and it had nice pointy areas that I could modify to be knives. With a few adjustments, I had a great looking A and G. I showed it to my wife for feedback, and she said, "What if you overlap them?" After a little playing around with that, it just clicked, like magic. THIS was it. Then the final touch-ups to give it depth, addition of woodgrain, and some grey on the knife blades. 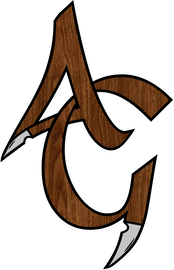 My new simple logo Finally, a logo I really like. Then came the secondary part of figuring out the rest of the font to go with it. Using the same font as the logo was too much and didn't look professional enough. Simple sans serif fonts were plain and lacked character. Again, the balance was struck in a way that felt cohesive: interesting but professional, clean but characteristic. The compact version of the full name Have you ever tried to create a logo or branding, whether for yourself or your employer?
Leading into this past Christmas season, I received an unusual request from someone who contacted me on my Etsy shop. She wanted to send me the legs to a dining chair that was meaningful to the family, and then have me cut them up to create ornaments that she could give as gifts to members of the family. After confirming some details, like the fact that I don't have power tools and would only really be able to create cross-sections of the legs with a handsaw, we agreed on the transaction, and she mailed me the legs. I don't know what kind of wood the legs were made of, but it was harder than I had hoped, making it time-consuming to create the dozen pieces she requested. Compounding that difficulty was the fact that the legs were tapered on all sides, so I didn't have a good way to make sure my cuts were perpendicular to the axis of the chair. I ended up using a lot of my left hand to hold the legs in position as I sawed with my right. Here's a shot of the set-up I was using: 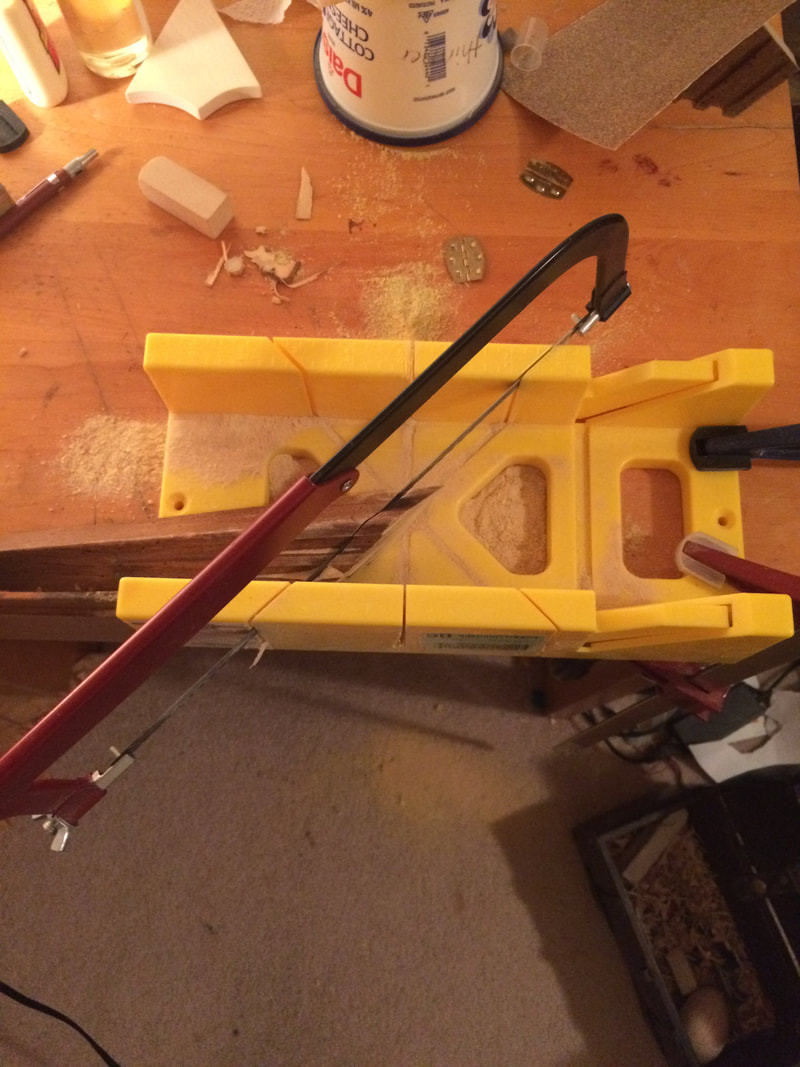 You can see that I have a mitre box sitting loose on my desk, so I had a couple of bar clamps to hold it down. Unfortunately, with the leg sticking out the left side, I couldn't put a clamp on that side. You can also see that I'm cutting at a 45 degree angle here. She said that simple cross-sections was sufficient for most of the ornaments, but she wanted two of them to be more special. Since the outer finish on the wood was different from the inside, and the outside had the grooves on two sides, I determined that I couldn't readily embellish them on the outer surface, so it would have to be done on the face. The legs were fairly small, so, in order to give myself more working room on the face, I decided to cut these two at 45 degree angles. Here are the results of my basic cuts: 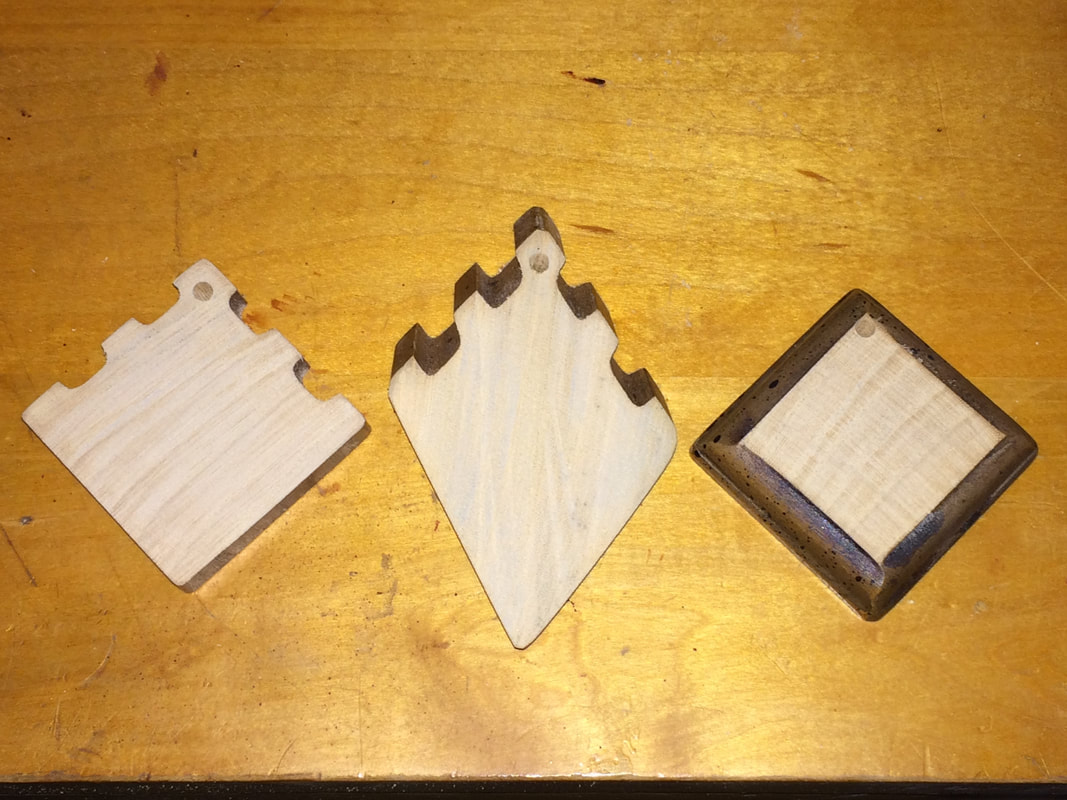 You'll notice the holes in the tops of each. (Yes, a hand drill is the one piece of powered equipment I have.) Well, again, without a proper workshop and tools, I had to get more creative with this process too. This is what that looked like: 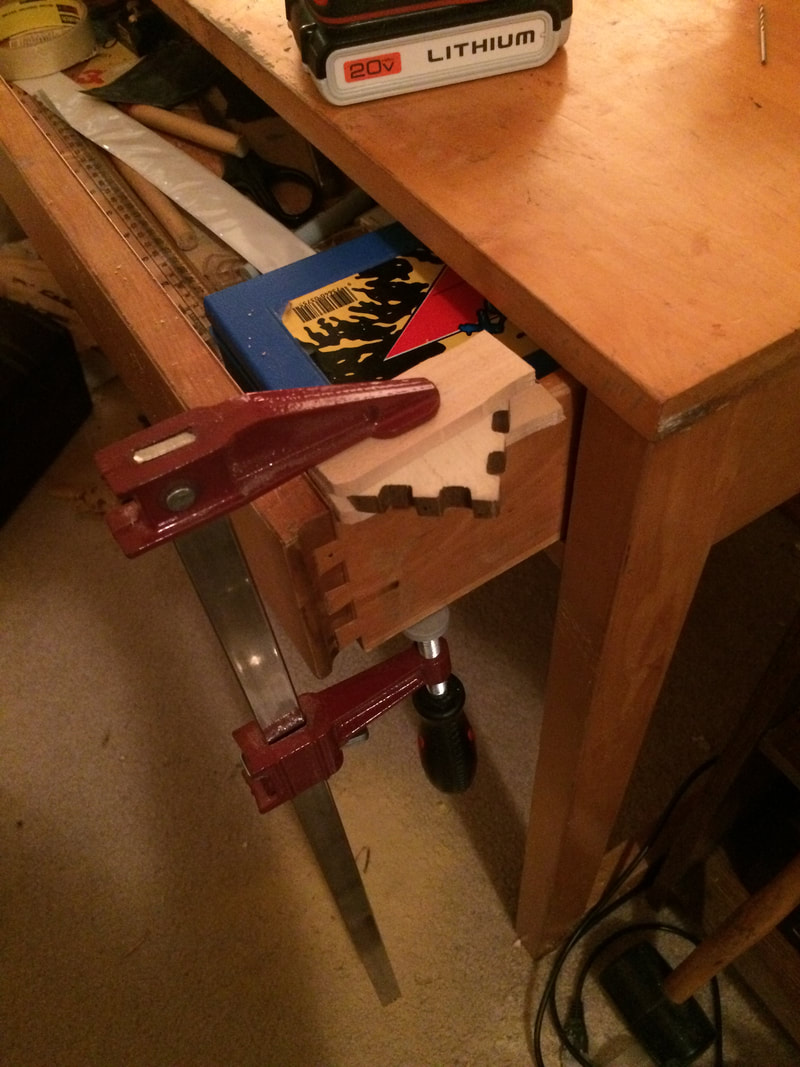 Chip carving is obviously my specialty and what I'm comfortable with, so I attempted a practice piece with the wood to see if that would work for the embellishment. Between the wood being hard and carving into the end grain, chip carving was not working well. But I've also been working on learning kolrosing, which is more decorating wood by creating and filling in grooves with a knife rather than removing pieces. So I gave that a shot on the same practice piece. The result was a little fainter than I'd like, but I determined that it would work for my purposes. This shows the abandoned-chip-carving-turned-kolrosing:  So then all that was left was to come up with a design, carve it, and apply a finish to the pieces. In order to alleviate the faint lines, I ended up running the knife through the cuts twice to get them deeper. The embellished carving is below. (Manz is the family name.) 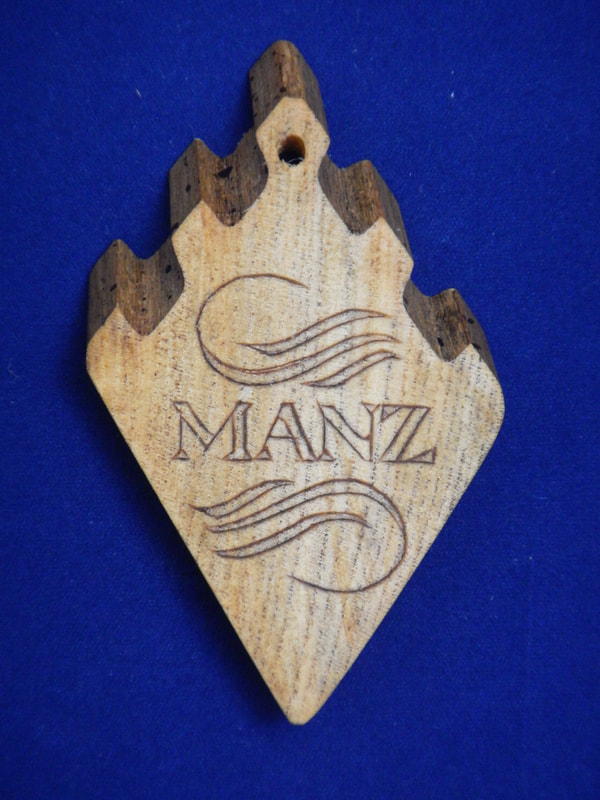 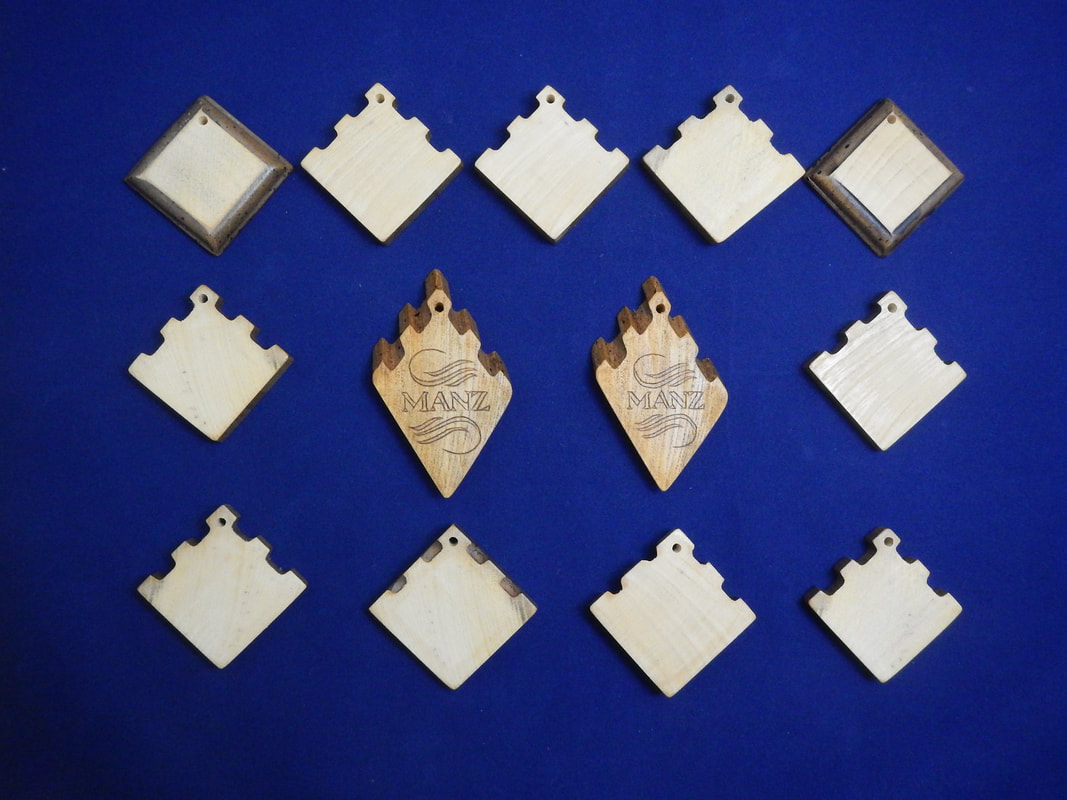 So it was definitely a new and interesting venture. I charged less than would otherwise be appropriate since I didn't really know what I was doing or how it would turn out, but that's how it goes when you start something new. My wife enjoyed laughing at me as I worked up a bit of a sweat sawing through all of these pieces with my mitre box clamped to my desk! And I was glad to be able to help create something meaningful for that lady and her family.
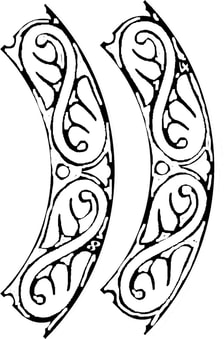
Oh, and if you're wondering about the "cinnamon" part of the title, that's what I used in the kolrosing to make the design dark. As I think is fairly common among modern chip carvers, I use a laser printer and heat tool to transfer patterns onto my projects. This allows me to get sizing and spacing perfect ahead of time, as well as make sure that symmetrical and repeating patterns are perfect (at least starting out). This system works very well for the majority of my projects: small/medium boxes, trivets, Christmas ornaments... But then I run into something like the project I'm currently working on, which is a 14" plate. Since I have a standard household printer, there's obviously no way I can print a design that size all at once. So this requires me to get a little creative. With most of my large plates like wedding plates, the design components are smaller and separable to print, and I can just draw a simple outer border by hand. As you can see below, though, this design was not going to be conducive to drawing out by hand. But again, the outer diameter of this pattern is about 13" -- unprintable. My solution: chop it up into smaller pieces that I can then rearrange on a page to print, cut out the pieces, and reassemble before applying to the wood. The end goal is on the left below, and the right image shows what I ended up printing. (I obviously had to print two pages since those two arcs are only ¼ circles.
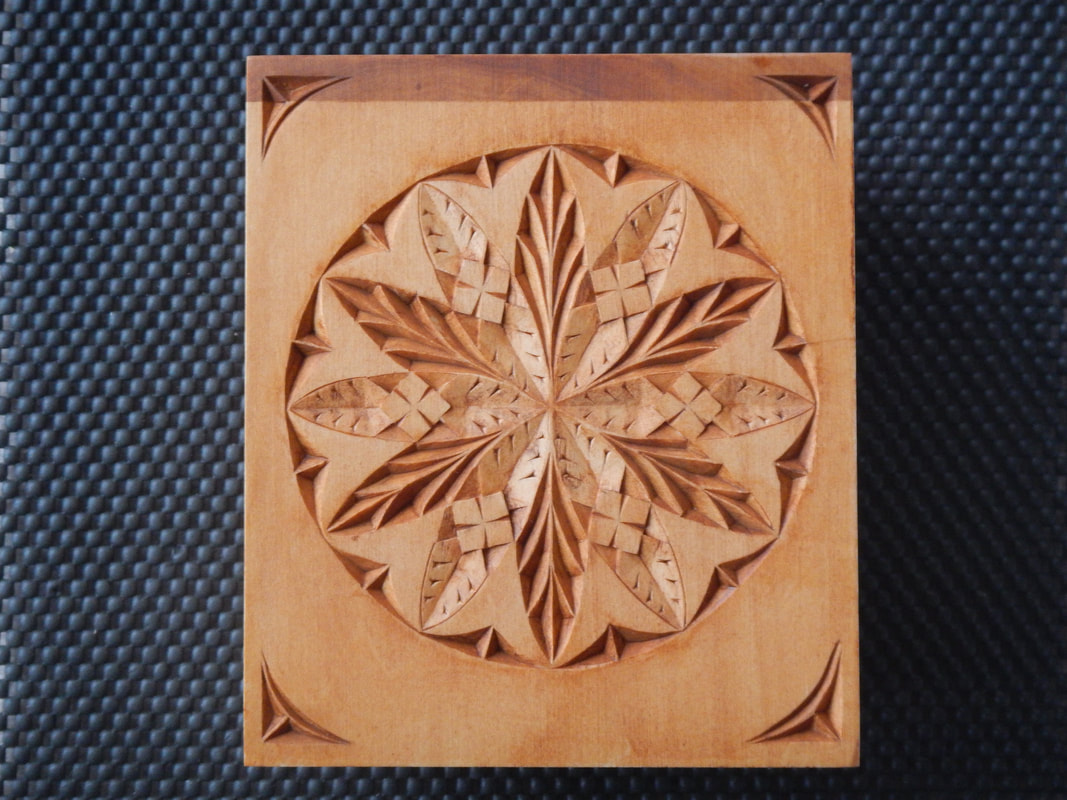
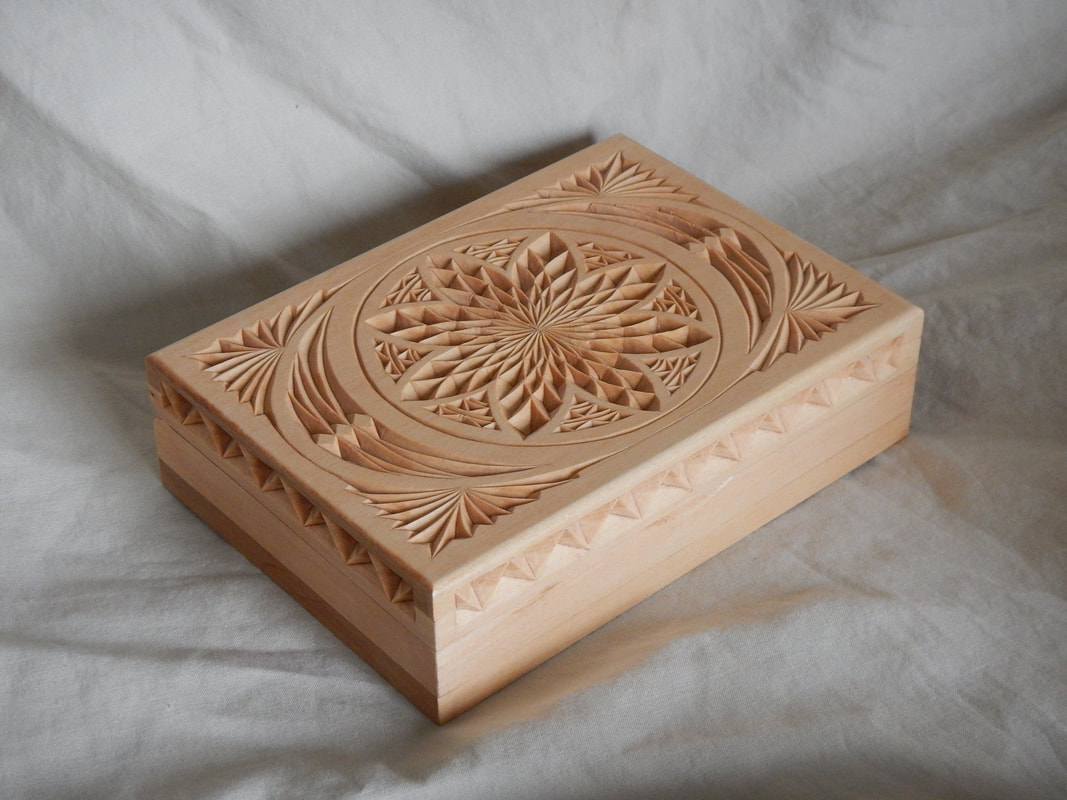
You may notice a small 4 and 8 hidden in the arcs on the right. While the design is intended to be perfectly symmetrical, even on the computer there can be small differences in alignment around the circle. So to make sure the printed pieces fit back together exactly right, I indicate which of the pieces goes where when reassembled. You'll also notice that the arcs look much messier, with most of the black background removed. That's strictly for the purpose of saving toner. The point of printing out the design is so I know where to carve. Anything with black on it is going to get thrown away, so it doesn't do any good to print out a bunch of extra toner that just gets wasted. By primarily leaving the outline of the design and removing the filler, I can save on toner. So there you have it, three of my tricks to applying large designs to projects: remove unnecessary black areas, break it up to print, and number the pieces like a puzzle to ensure proper alignment. Then it's just a matter of taping the pieces together and applying the pattern like any other. You can see the final result of this process at work below. I'll likely end up using a pencil to fill in any of the lines that are faint before carving. Hopefully this is helpful for any carvers looking for tips or at least interesting for anyone else. 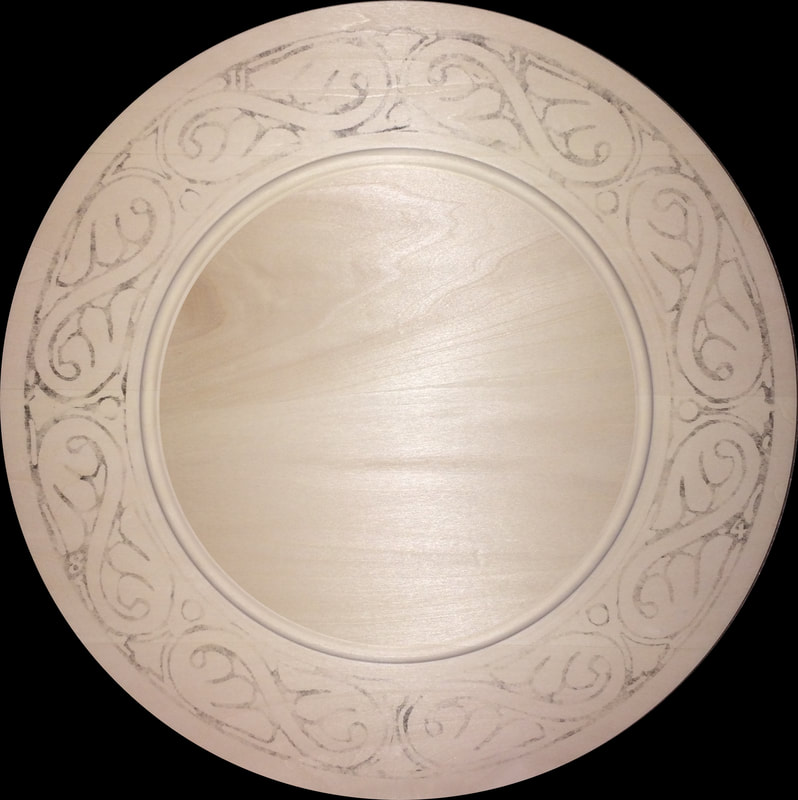 During an anniversary trip to Germany, my wife and I visited an old cathedral in Frankfurt called Kaiser Dom, or "Caesar Cathedral." And when I say "old," we're talking about the site of coronation for emperors of the Roman empire. (Hence, the name.) And they actually still hold services there too. While inside, I spotted a large stained glass window with a rosette. Not all stained glass designs work well for chip carving, but this one struck me as particularly workable and cool. Once we got home, I adapted the design of the window to something chip carvable, a process that necessarily included some changes. Below you can see the original window and the my rendition in wood. When you're a chip carver, there's no telling where you might find inspiration for your next carving... 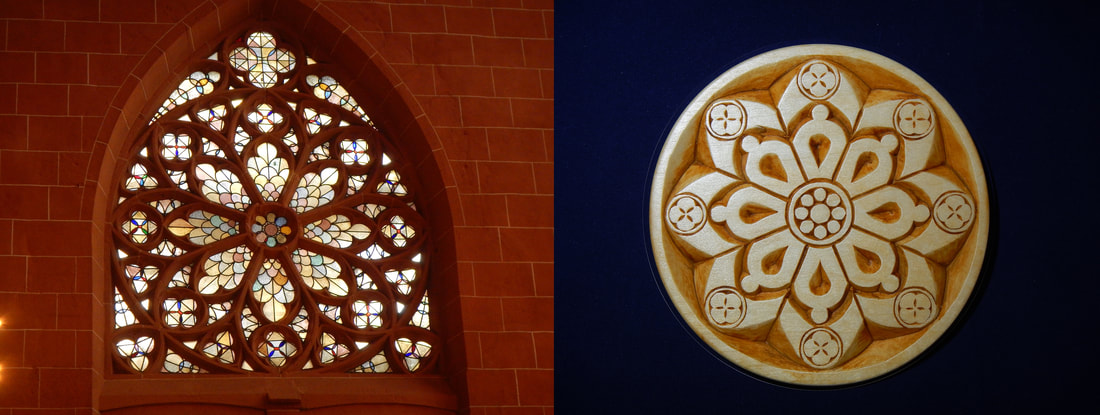 When I was at the Madison carving show and sale last October, the table across the aisle from me was a couple who did a mix of carving and wood burning. One of the items in particular caught my attention. It was a burned picture of a bird, but that's not the part that intrigued me. The image was itself framed -- just like any other picture would be. So the end result is actually a piece of wood framed in wood, but it was a very nifty idea, and gives the piece a nice professional, polished look to it. As I packed up and left the show, I kept that in mind. While my carvings aren't actual images, per se, like the burned bird, some of them certainly can be used as stand-alone pictures. I already had some scrap cedar wood on hand from another project, and I thought the colour and contrast with the pale basswood would make a great frame. So I cut off a square piece of a practice board and carved a rosette that's intricate enough to stand on its own. Then I cut a few pieces of the cedar to length and got to work on what amounts to more actual carpentry than anything. The hard part is that I wanted the frame to stick up above the surface of the carving, just like a normal picture frame does, but the cedar board I had wasn't thick enough to do that. This then required me to cut a notch out of the inside of all of the pieces so that they could overlap the carving. Then I hand-carved the 45-degree mitre cuts. Because all of these cuts are done by hand, they're not quite perfect, meaning each frame piece had to be precisely matched to a specific side of the carving so that they would exactly fit the carving and each other. This whole process of creating the frame took longer than carving the rosette itself, but it was a fun process to learn how to do. Here's the final product on that first framed rosette: 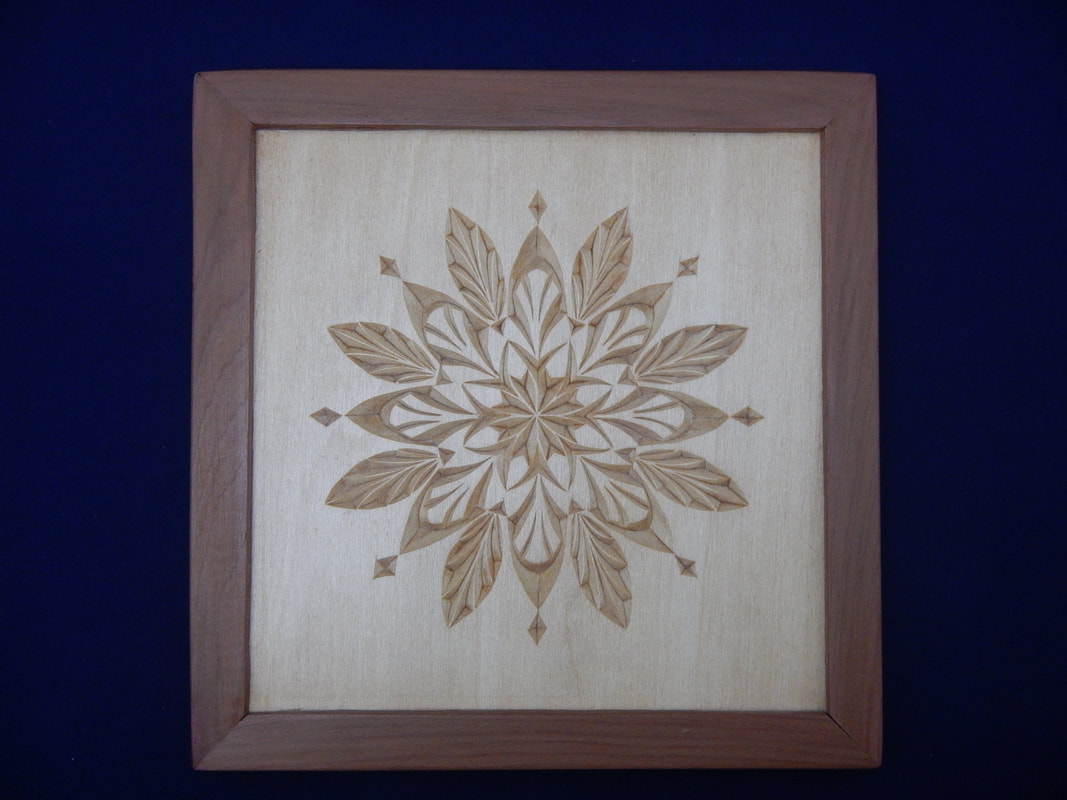 I was really very happy with how it turned out. The cedar frame is absolutely beautiful, and the frame joints worked out great. In fact, between how well it turned out, how long it took me to make it, and the fact that I caused a bit of damage when carving the frame pieces, I decided to keep this one rather than sell it. No worry, though, as I went ahead and made a second one. This time, though, I had a friend with access to more tools make the long grooves on the frame pieces, and I got and used a mitre box to facilitate the corner cuts. This second one was a bit smoother of a process (since I kind of knew what I was doing this time around), and the results are still great. I look forward to making more of these in the future, trying out larger sizes, different designs, and different framing woods. 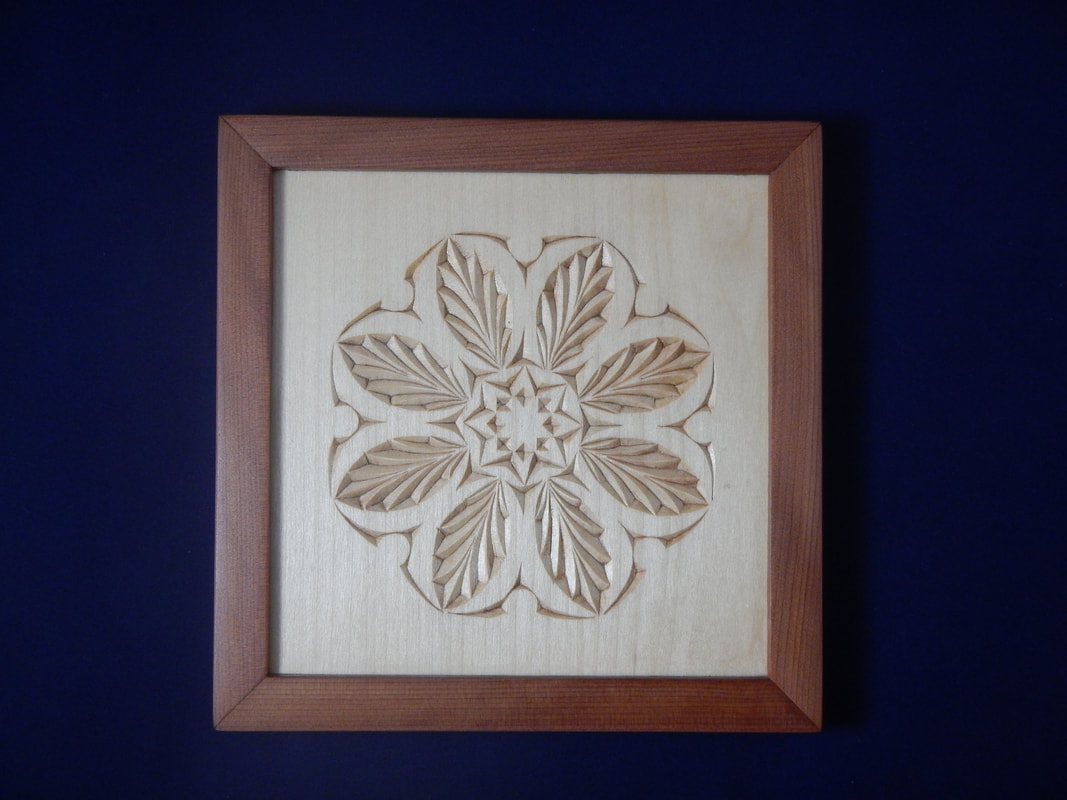 As with probably all art, chip carving is a multi-faceted medium to engage with. To start with, there’s obviously the immediate appeal of the design itself to be visually enjoyed. One thing I find particularly interesting about chip carving is how it seems to blend 2D with 3D art forms. We’re all familiar with drawings and paintings creating an image, which will typically employ what amounts to optical illusions to give the impression of depth, texture, etc., and then there’s what’s called carving in the round, where the art piece fully takes on the form to be represented, like a dog or a flower. When laying out a design to be chip carved, you’re working in 2D — just lines on a page or board. But once you begin carving, a 3D appearance naturally takes shape as the shadows and angles within the chips take form and add an extra layer to the design that was either invisible or obfuscated when viewed flat. (It can be hard at times to even get a good idea how a drawn design will look once carved.) However, because the design is itself most naturally two dimensional, similar techniques as are used in drawing or painting can be employed here as well to give the impression of two strands wrapping around each other or one object being on top of another. And this effect is only enhanced by the actual 3D nudge that removing the wood brings. 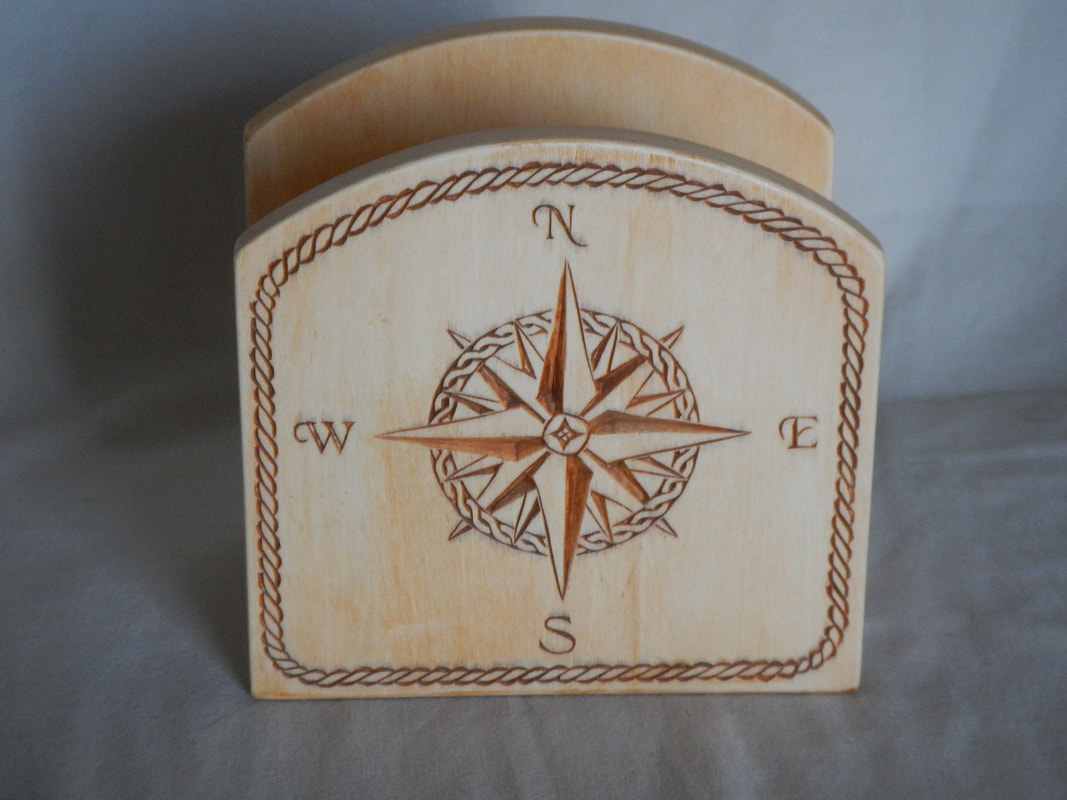 There's plenty of illusory depth here with the twisted strands and compass betwixt. A well-constructed chip carving design will naturally flow and blend together to give a cohesive and clear image, but some more interesting and difficult designs will continue beyond the eye to the mind, causing the viewer to observe some of the details and perhaps even wonder how it was accomplished. After all, the whole art is done with but a single tool: a straight, flat, 1” long blade. Oh, but the wonders that single tool can accomplish! 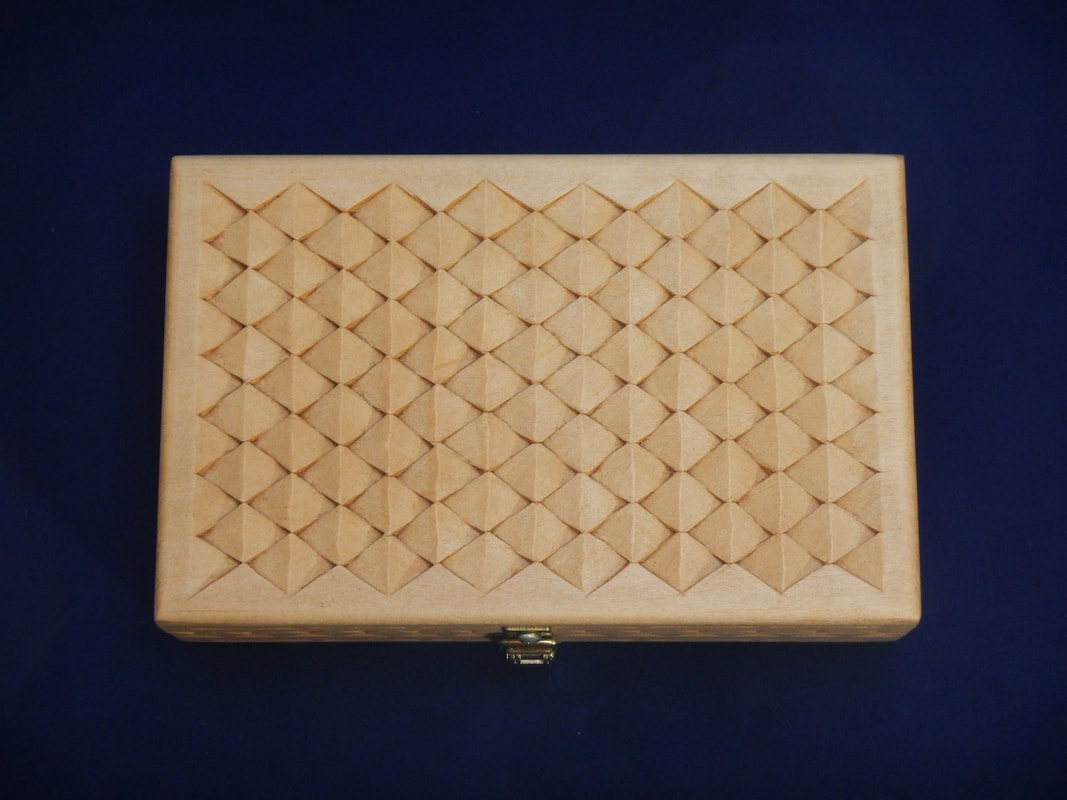 The top of this box is solid wood, but it sure does look tightly woven. If given the opportunity, the hands are also a wonderful participant in the art of chip carving. I still regularly enjoy simply running my hands along a carved surface, feeling the intricate landscape of the wood as my fingertips ride up and down, navigating the crisp peaks, flat plains, and valleys of varying depths. It can all feel so fragile and delicate, in contrast to the strong and durable nature of wood that we’re more accustomed to. (Keep in mind, though, that the finishing process actually fortifies and protects the carving, so it’s not actually as delicate as it feels.) And because the tactile feel of a carving is such a valuable part of the experience, much attention to detail goes into that aspect — things like evenness of the surface, smoothness, and sharp edges. Since I don’t myself make the items that I carve, they come to me in an unpolished form, requiring final touches such as I just mentioned. It’s amazing how the eyes and hands have so much overlap in what they perceive, but there are still things that are only accessible to one or the other, so the hand test is an important step in the finishing process: to simply hold the piece and move it around in my hands to make sure it just feels pleasant to handle. Below are some pictures of matching boxes, one sanded and the other unsanded, or in the form I received it. Obviously one goal is to make the surfaces even and smooth (which helps with staining as well as tactile appeal), but the edges of the box also get some attention. The unsanded corners are quite harsh, and, while they don’t hurt, they do catch your attention when holding it. So the goal is to get them softened enough to not capture notice, but to remain crisp enough to still look like a clean edge. (This final sanding process actually takes quite a long time for each of the star/snowflake shaped ornaments because there are so many surfaces and edges to get just right.) The final facet I’ll mention here is the functional nature of chip carving. Traditionally as well as today, many of the items that are chip carved are functional — things like boxes, bowls, toothpick holders, and coasters, just to name a few. It’s another wonderful blend to be able to add beauty to practicality. (Or is it adding practicality to beauty?) In a modern world of disposable goods and constant upgrading, it’s refreshing to have some practical item that can have a timeless appeal and last for years. Who knows! Maybe some of the items I carve could end up being heirlooms in my family or someone else’s. 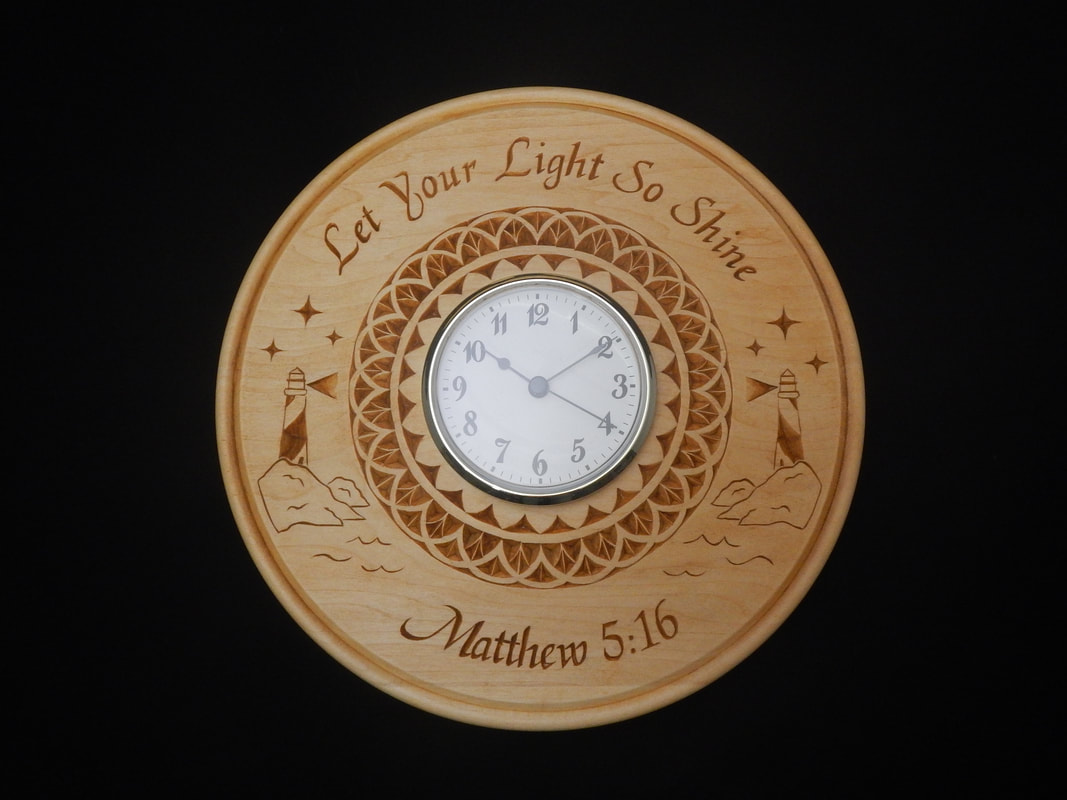 So what do you think? Are there any other facets of chip carving that engage you?
In my first ever post here, I talked about selling items at a sale in Conklin, MI, but that was by proxy. I wasn't there personally. October 21, 2018 was the first time I attended a sale myself. It was the Capital Area Carvers of Wisconsin's annual wood carving show and sale. There were plenty of oo's and ah's, questions of how it's done, and lots of other carvers stopping to talk shop. Being my first sale, I wasn't entirely sure what it'd be like or what I would need, but I think it went well and even made a few sales. The seven hour day went by quicker than I anticipated. It was a good experience with hopefully more to come. 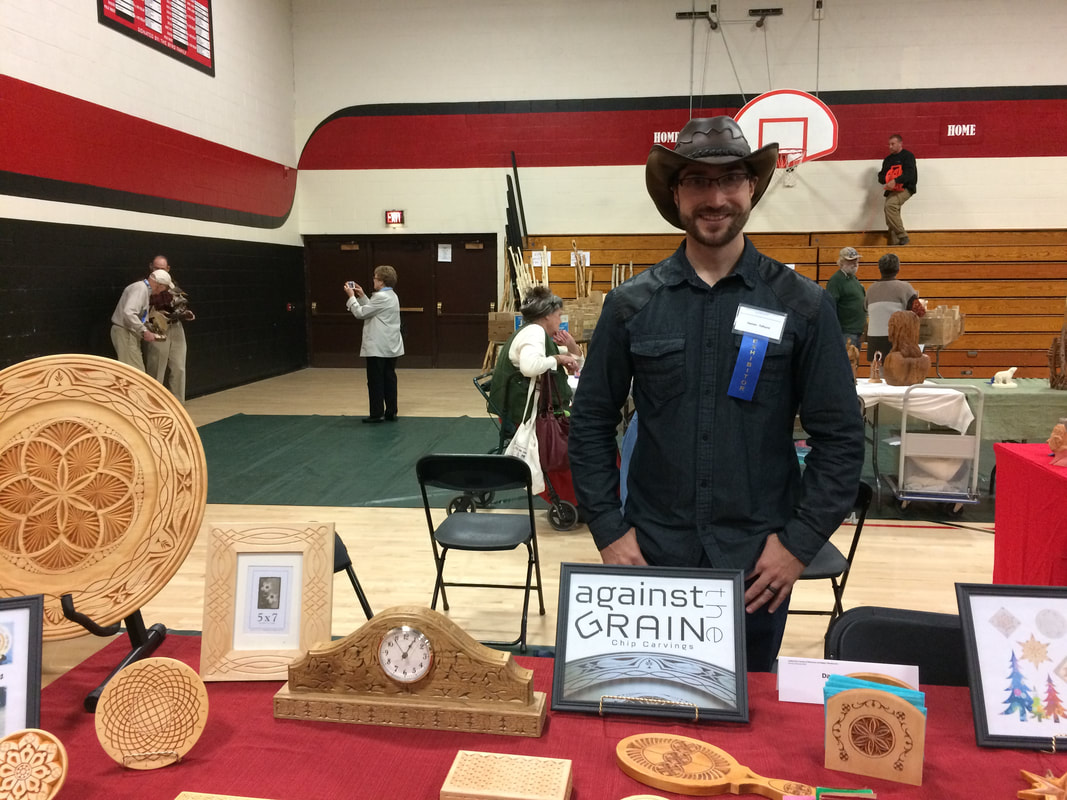 It's been just over three years since I picked up the craft of chip carving, and almost exactly three years since I completed my first project that wasn't on a practice board. That first coaster was still a little rough, so I kept it for myself and still use it daily at work; but it gave me enough confidence to venture out into the world with my knives in hand. That first year was all Christmas gifts for friends and family. It was the next year, mid-2016, when I started carving things to sell. Now, another year-and-a-half later, I've got a website, an Etsy shop, and 67 projects in my pocket. That's right, 67 completed projects, which is nearly two each month! Follow me through my journey so far with photos of projects that highlight my experience. Coasters and boxes and plates, oh my! (Click on a picture to see a bigger version and easier-to-read caption.) Around early September, I was contacted by another chip carver asking if I'd be willing to fill in for him in teaching a class that he was signed up for in November but unable to fulfill. I had never taught chip carving before, but I've done a good bit of teaching and chip carving separately, so I was interested in giving it a shot. Over the next few weeks, I took an online course preparing me to teach chip carving and putting together a lesson plan. The class was two days from 9-4 both days, which is pretty daunting for a first time. More that than, it was at the nationally renowned Vesterheim Norwegian-American Folk Art Museum in Decorah, Iowa, and the other teacher was a Gold Medalist in Vesterheim's competitions. People had signed up for this class with a very experienced and skilled carver and teacher, and now I'm going to step into his shoes as a 30 year-old who's been chip carving for 3 years. There was some pressure, but I felt that my skills and knowledge were suitable for the task. The first part of the class started out a little shaky as I kind of felt my way into the class and teaching chip carving, but it smoothed out over the course of the first day as I got to know the people and understood the interactions. The second day went very well, and everyone went away with at least one Christmas ornament made and several more blanks for when they got home. The feedback from the students was better than I had even anticipated after the class. Everyone indicated that I did a very good job and enjoyed the class. One guy even took the same class from the same instructor a year ago, and he was still able to learn some new things from me, which was very encouraging. It was a great experience, and I do hope to be able to do it more in the future. Since I still work a full-time job, though, it'll probably limited to only once or twice per year right now, but who knows where it'll lead down the road. 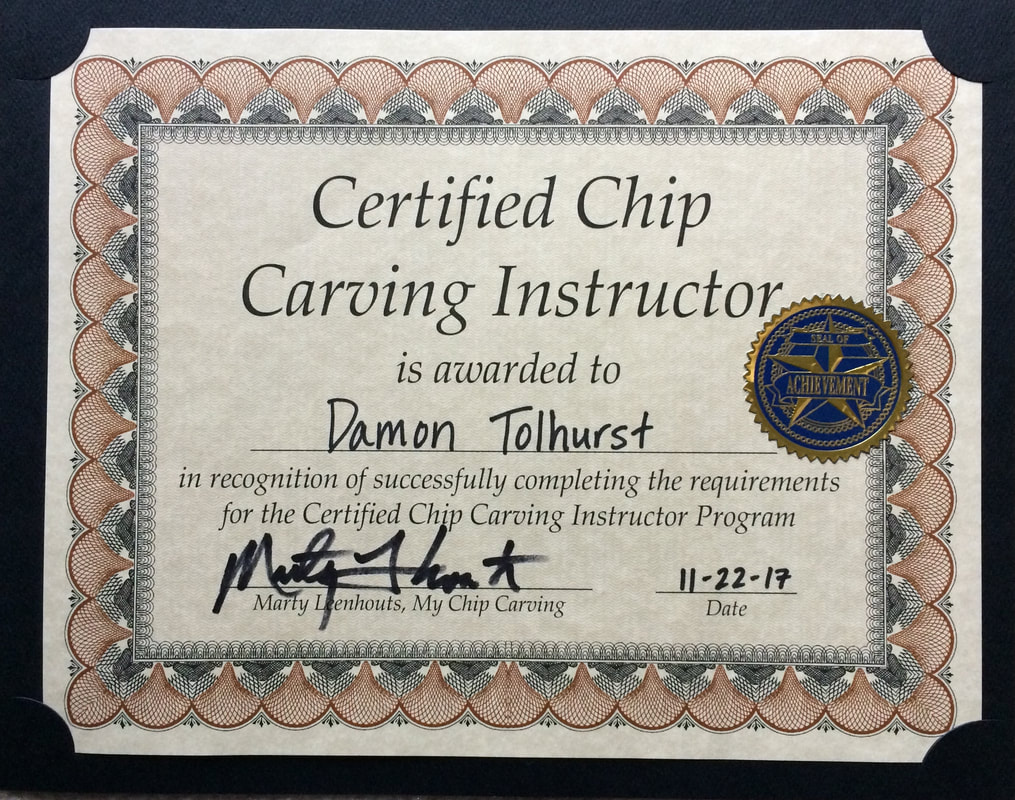 I recently had a commissioned order for a toothpick holder for a hunting camp cabin. One of the sides was to include an image of a skunk. The typical method of carving (see How It's Done on the About page) is to apply the pattern in black toner on the wood, and then carve that away. The interesting part of skunks, though, is that their body is the black part, with the stripes being white. I tried a practice version with this method, which resulted in the main body carved out and the stripes standing out. It looked alright, but didn't seem quite right. So I followed it up by doing the inverse: carving out the stripes, leaving the body of the skunk uncarved (except with an outline to form the shape). When I emailed the two versions to the buyer, I didn't bother to erase the black, and he actually particularly liked it with the black toner still in place on the wood. After some thought, I decided that I should be able to do that. When it came time to finish the piece, though, I wasn't entirely sure how the printer toner would respond to applying the sealer and stain. I was very careful to apply these very lightly and not dragging the brush across it, in case the finishing products might cause the toner to smear. I think it turned out very well, and it added a new option for designs that I can use in the future, where the toner remains permanently in the wood -- a sort of tattoo. 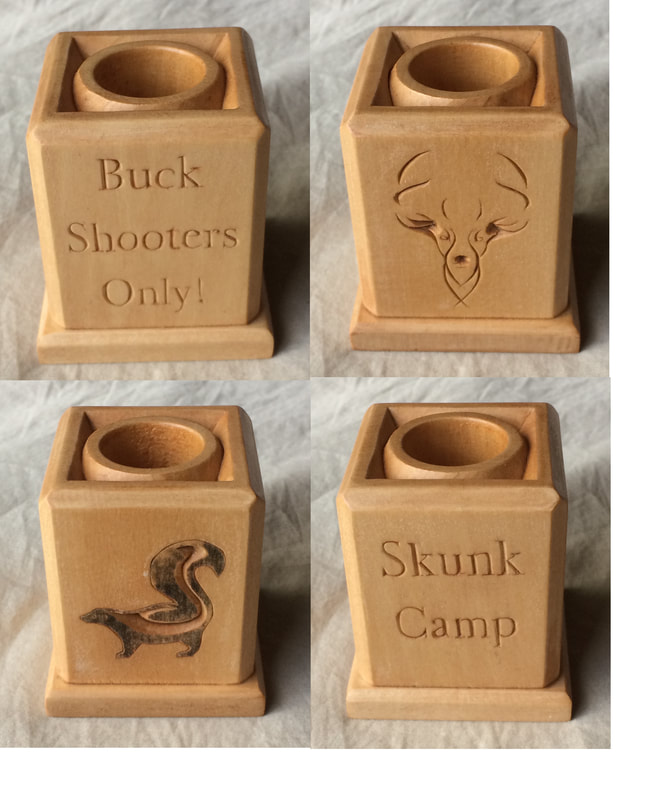
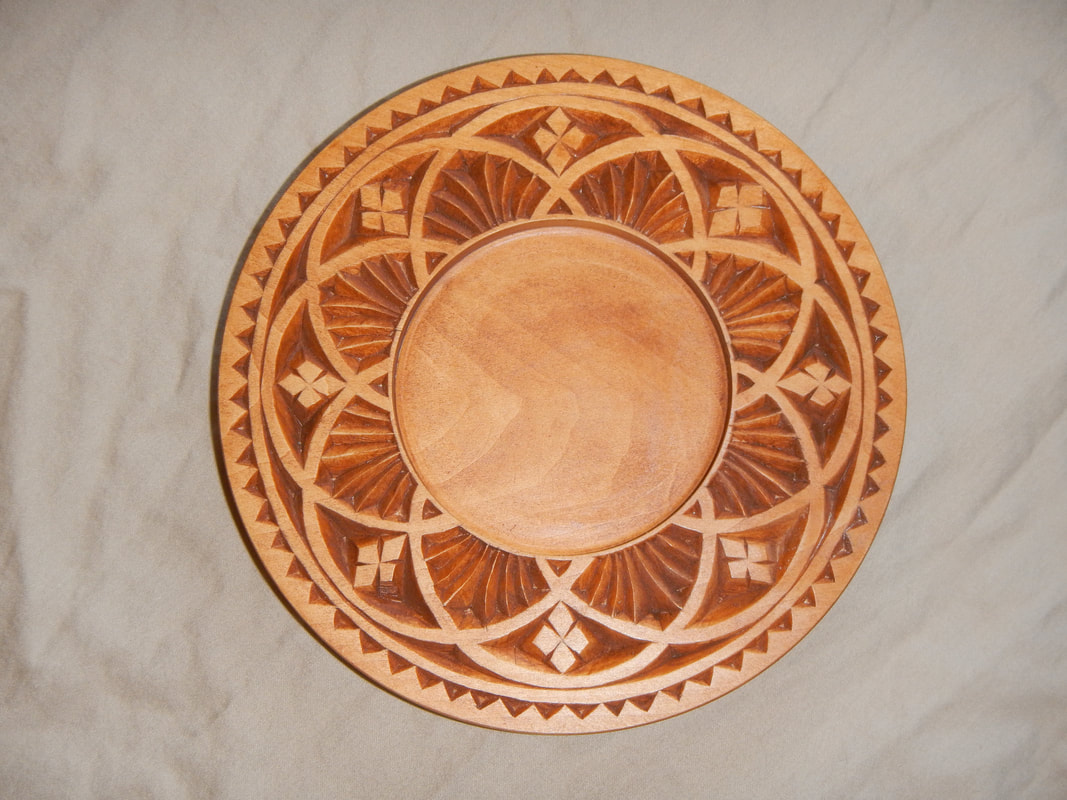
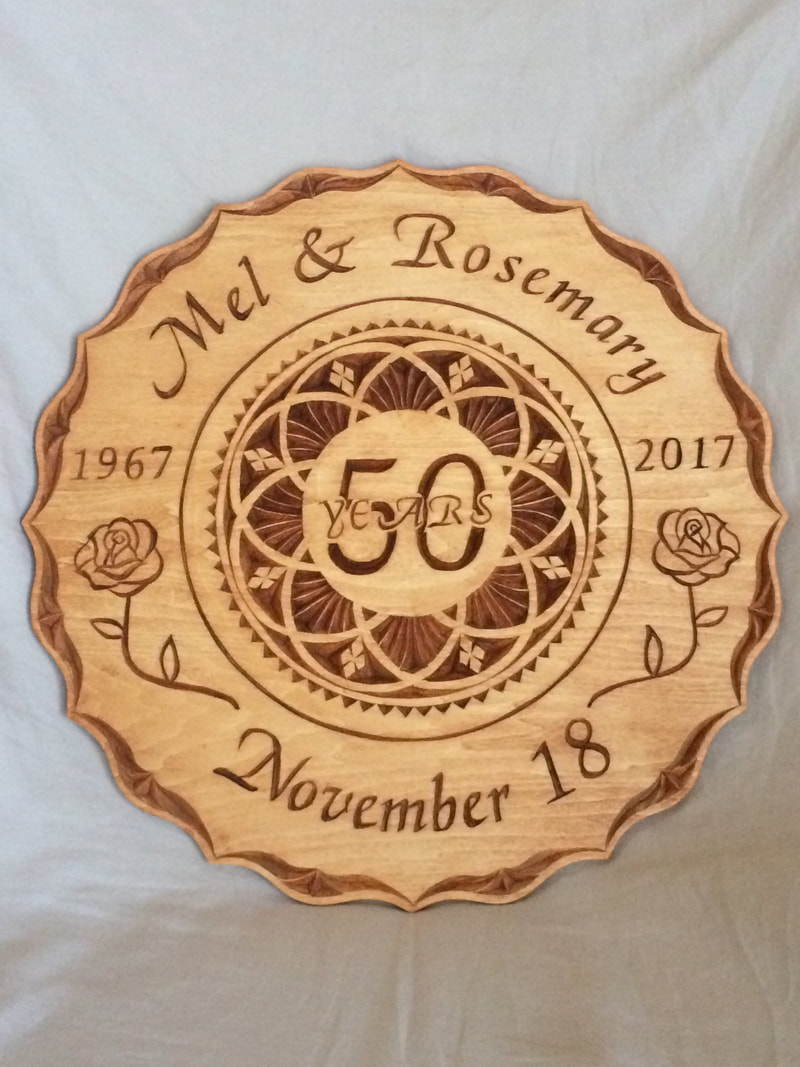
The great part about having something custom made is that you get to completely decide how you want it to look...even if you don't completely know how you want it to look. Here are a couple of examples of custom orders that took very different design journeys. 1) Anniversary Clock Plate  I received an email from someone who wanted a carved clock plate like another one of mine he'd seen, but he didn't have any particular design in mind. He just knew that he wanted their names and the date. So he left it up to me to come up with a design to fill in the details, including font. I asked a few questions to get an idea for the feel he was going for, and then got to work. He originally indicated he wanted a simple, standard type font. After putting together the rest of the design, I included a few examples with different fonts. Upon seeing the designs altogether, he decided he did actually like the more interesting font after all. With the design I chose, the names didn't really fill up the space very well, so I tried stacking them with the & in the background, but he preferred the names in a line. Totally doable, so I added the extra design just under the names to fill in the space and add some balance to the design. It took some teamwork, and we were both very happy with how this one turned out. 2) Decorative Plate 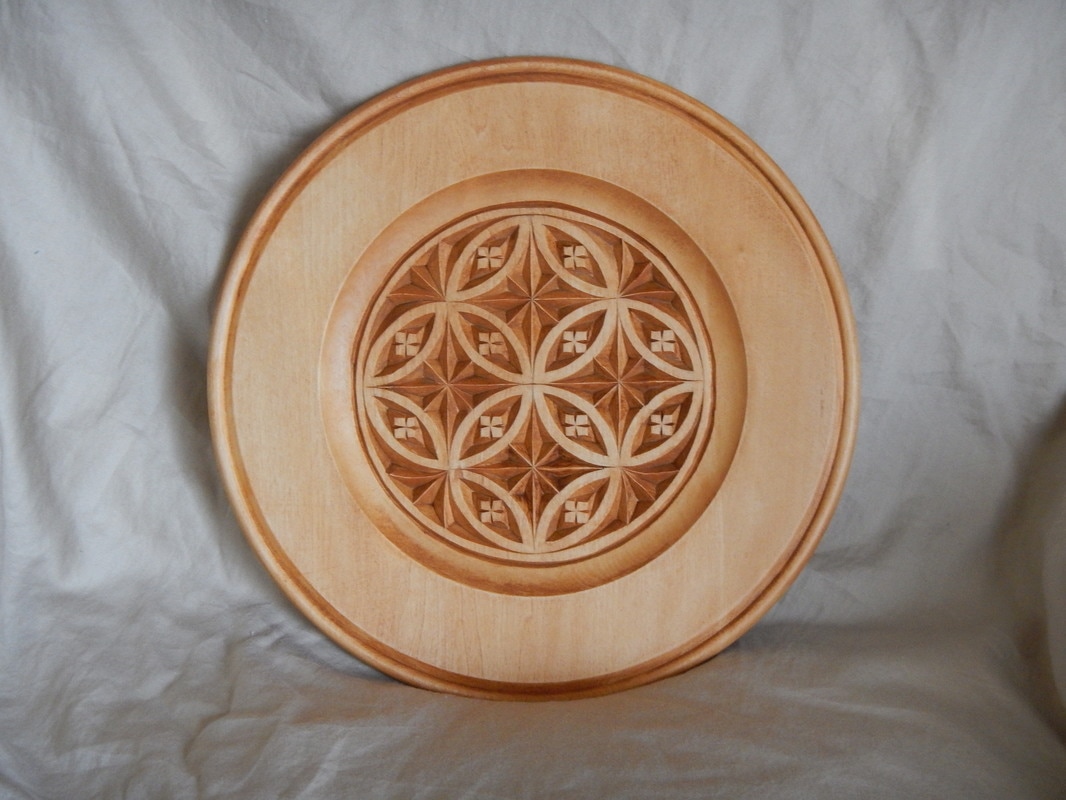 This order again came from someone who saw another piece I'd done and wanted something like it. This time, though, he wanted the exact same design but on a different item. He saw this interlocking circles pattern on a napkin holder and thought it would make a cool plate. He gave me a price range he was looking for, and I found a plate that matched his budget. I also originally tried adding a simple border in the outer part of the plate, but he said that he liked the simpleness of the plate leading the eye just to the rosette design. That one's obviously a simple enough change to make.
So whether you have precise features you're looking for, just have a general idea, or somewhere in between, I'll do what I can to accommodate any preferences. (And in any case, I always send an email with the final design to get the go-ahead before I start carving.)
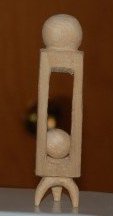
This time I decided to challenge myself and make more of a show piece, as well as bring my two styles together. This piece is a fair bit bigger and took a while longer. The spiral bars indeed proved more challenging than the straight square ones before, but the result is well worth it. I'm quite please with how this one turned out. The extra bits at the top and bottom gave me some opportunity to play around with some new chip carving patterns as well. (The ball is completely free from the cage, but I intentionally left it a little too large to freely roll around so that it can hover when standing up as shown. It does move all the way up and down with a little manipulating, though.) 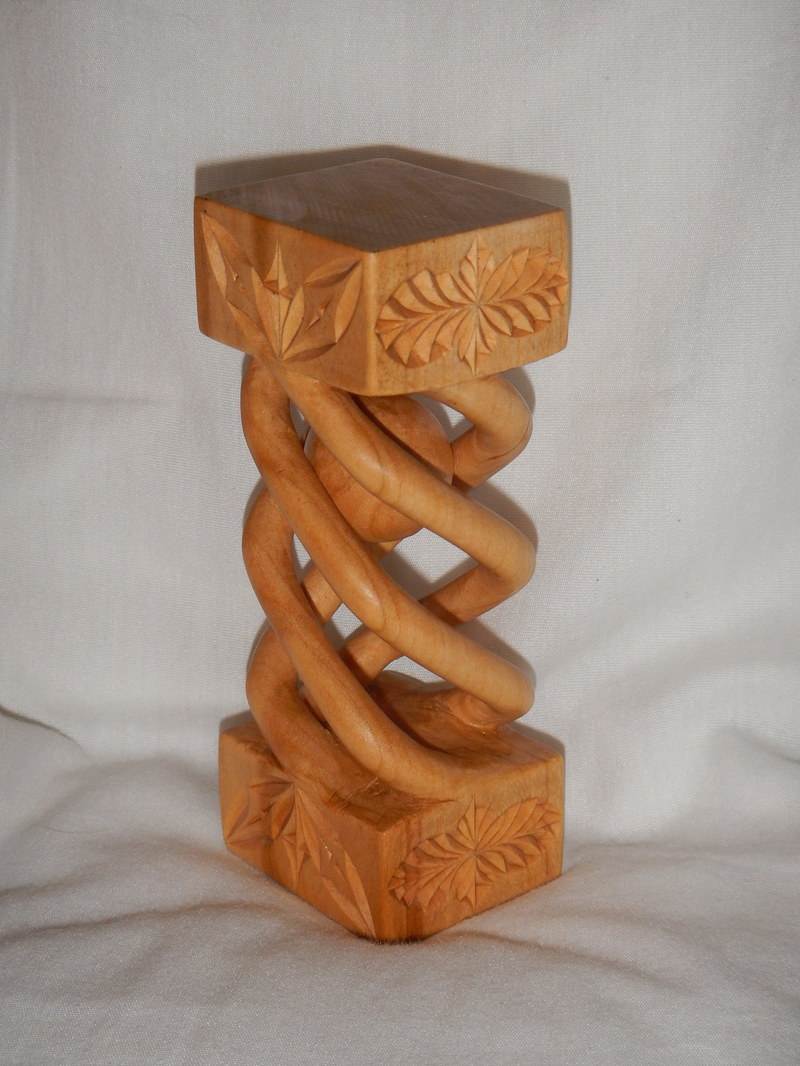 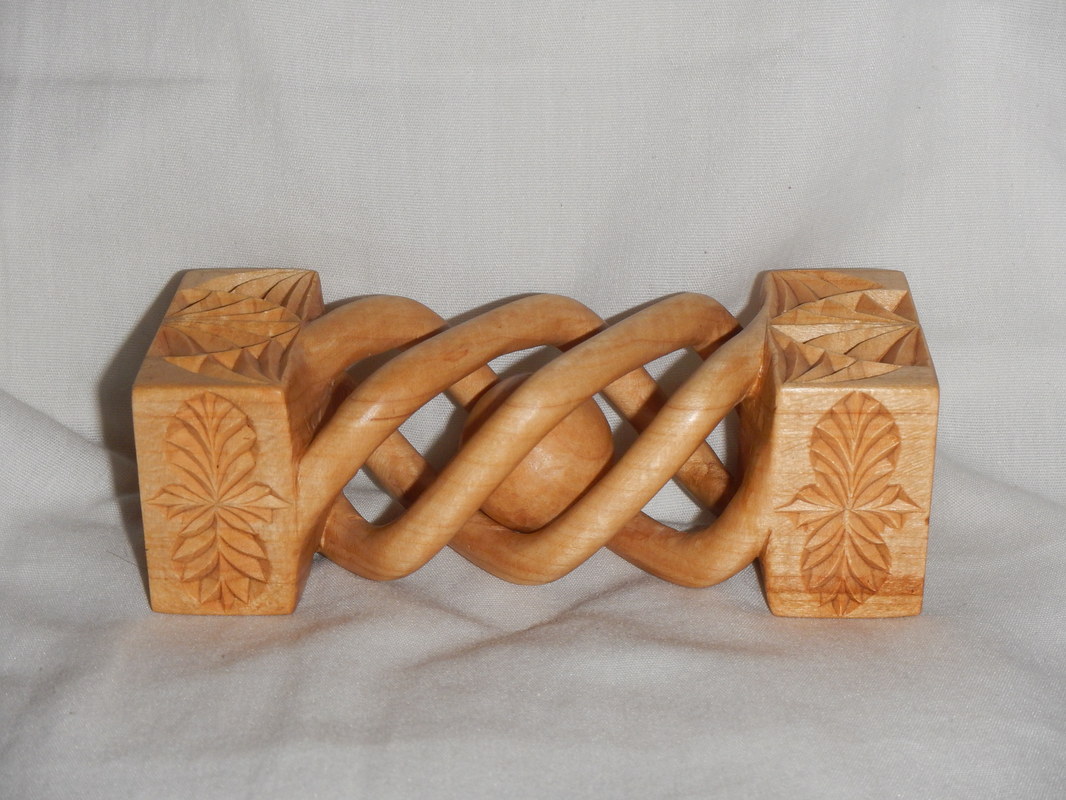 2016 saw four weddings for Against the Grain to celebrate with unique wedding gifts. Merry first Christmas and many marital blessings to Will & Corrinne, Ben & Abby, Russell & Tina, and Joel & Sarah. 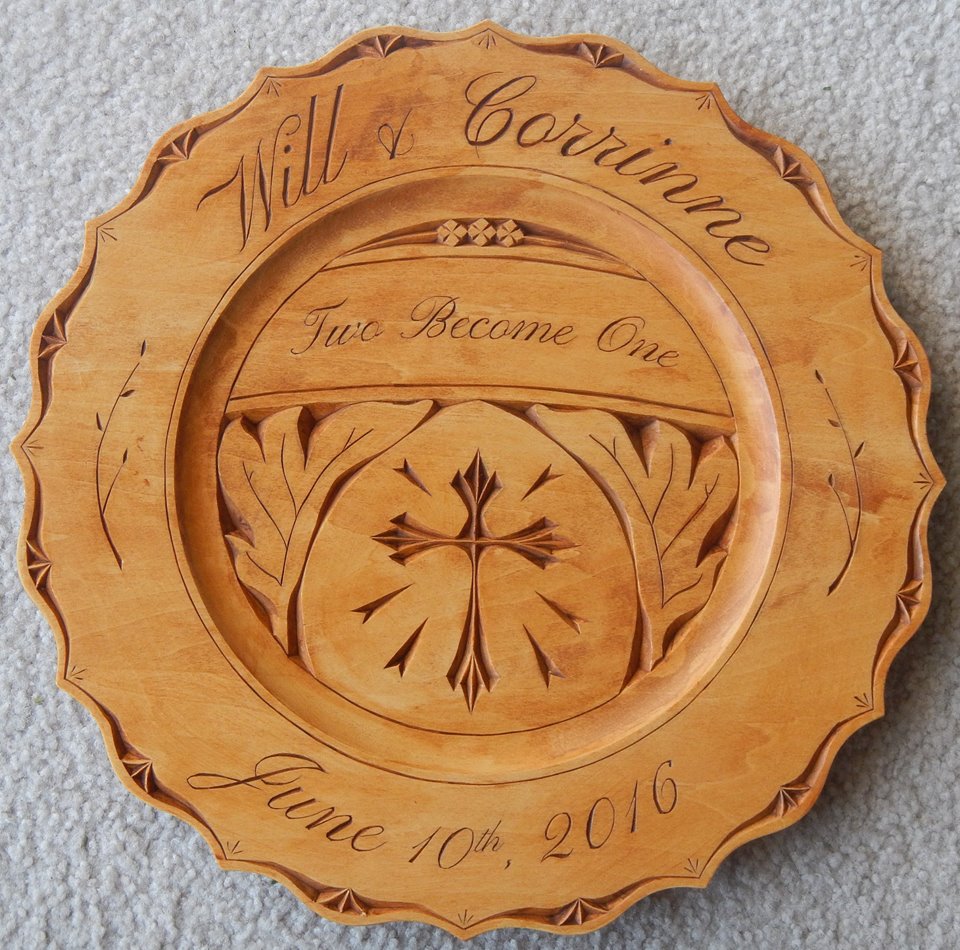 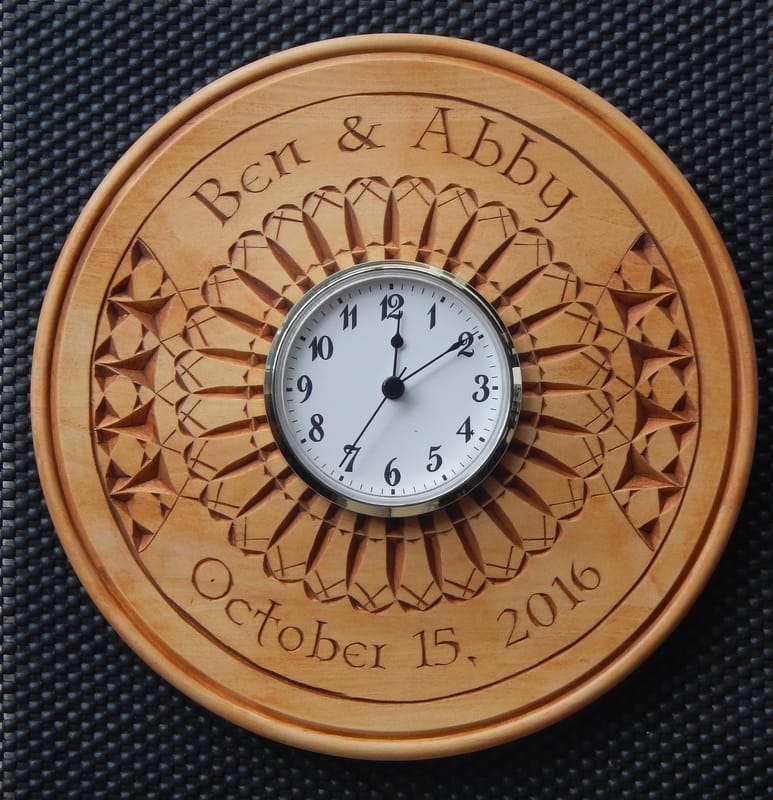 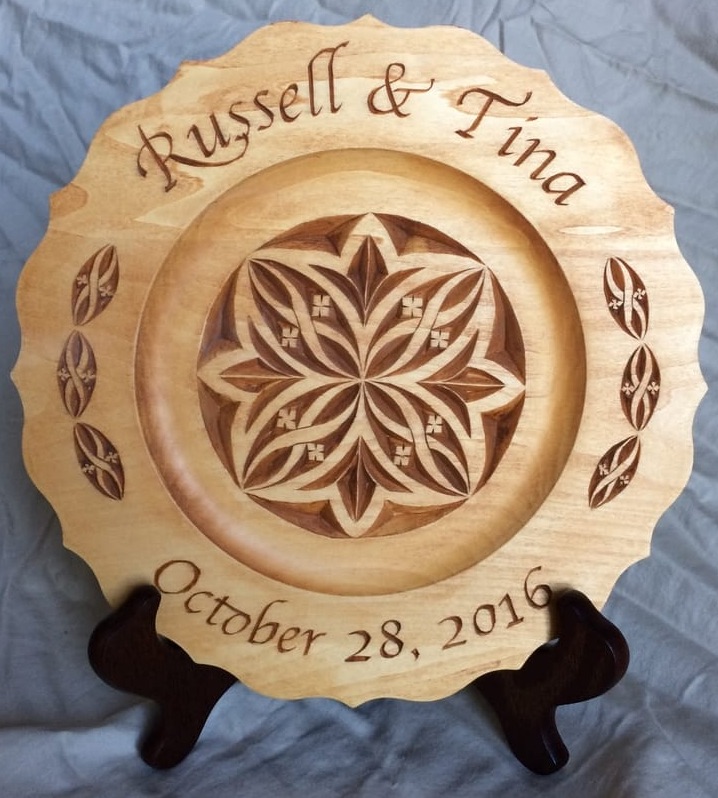 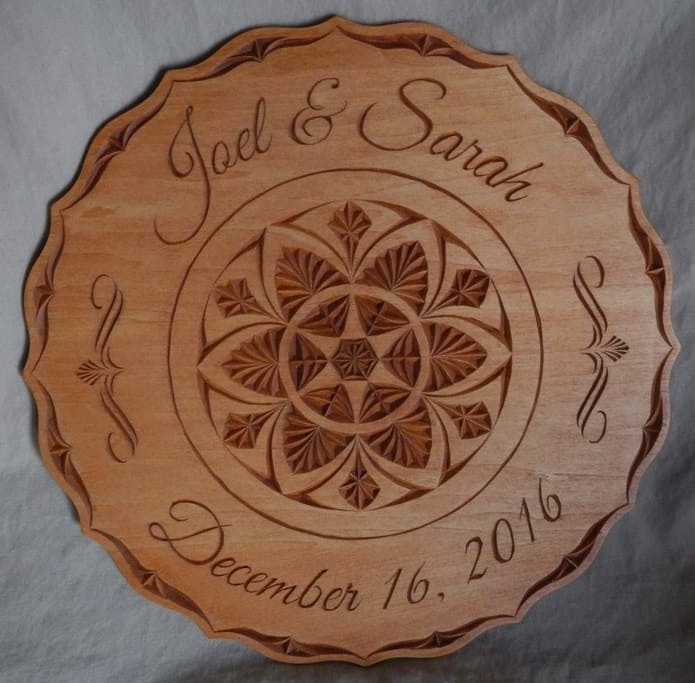 On November 18-19, Conklin Reformed Church in Conklin, Michigan held their annual fund-raising craft sale. Against the Grain was there with a display. Many people stopped by to appreciate the unique hand-crafted pieces. Some even thought they were done by machine, but we were sure to get their facts straight. Be sure to stop by and check it out in 2017 if you're in the west Michigan area. A special thanks to Kathy's Caramel (kathyscaramel.com) for hosting the table. 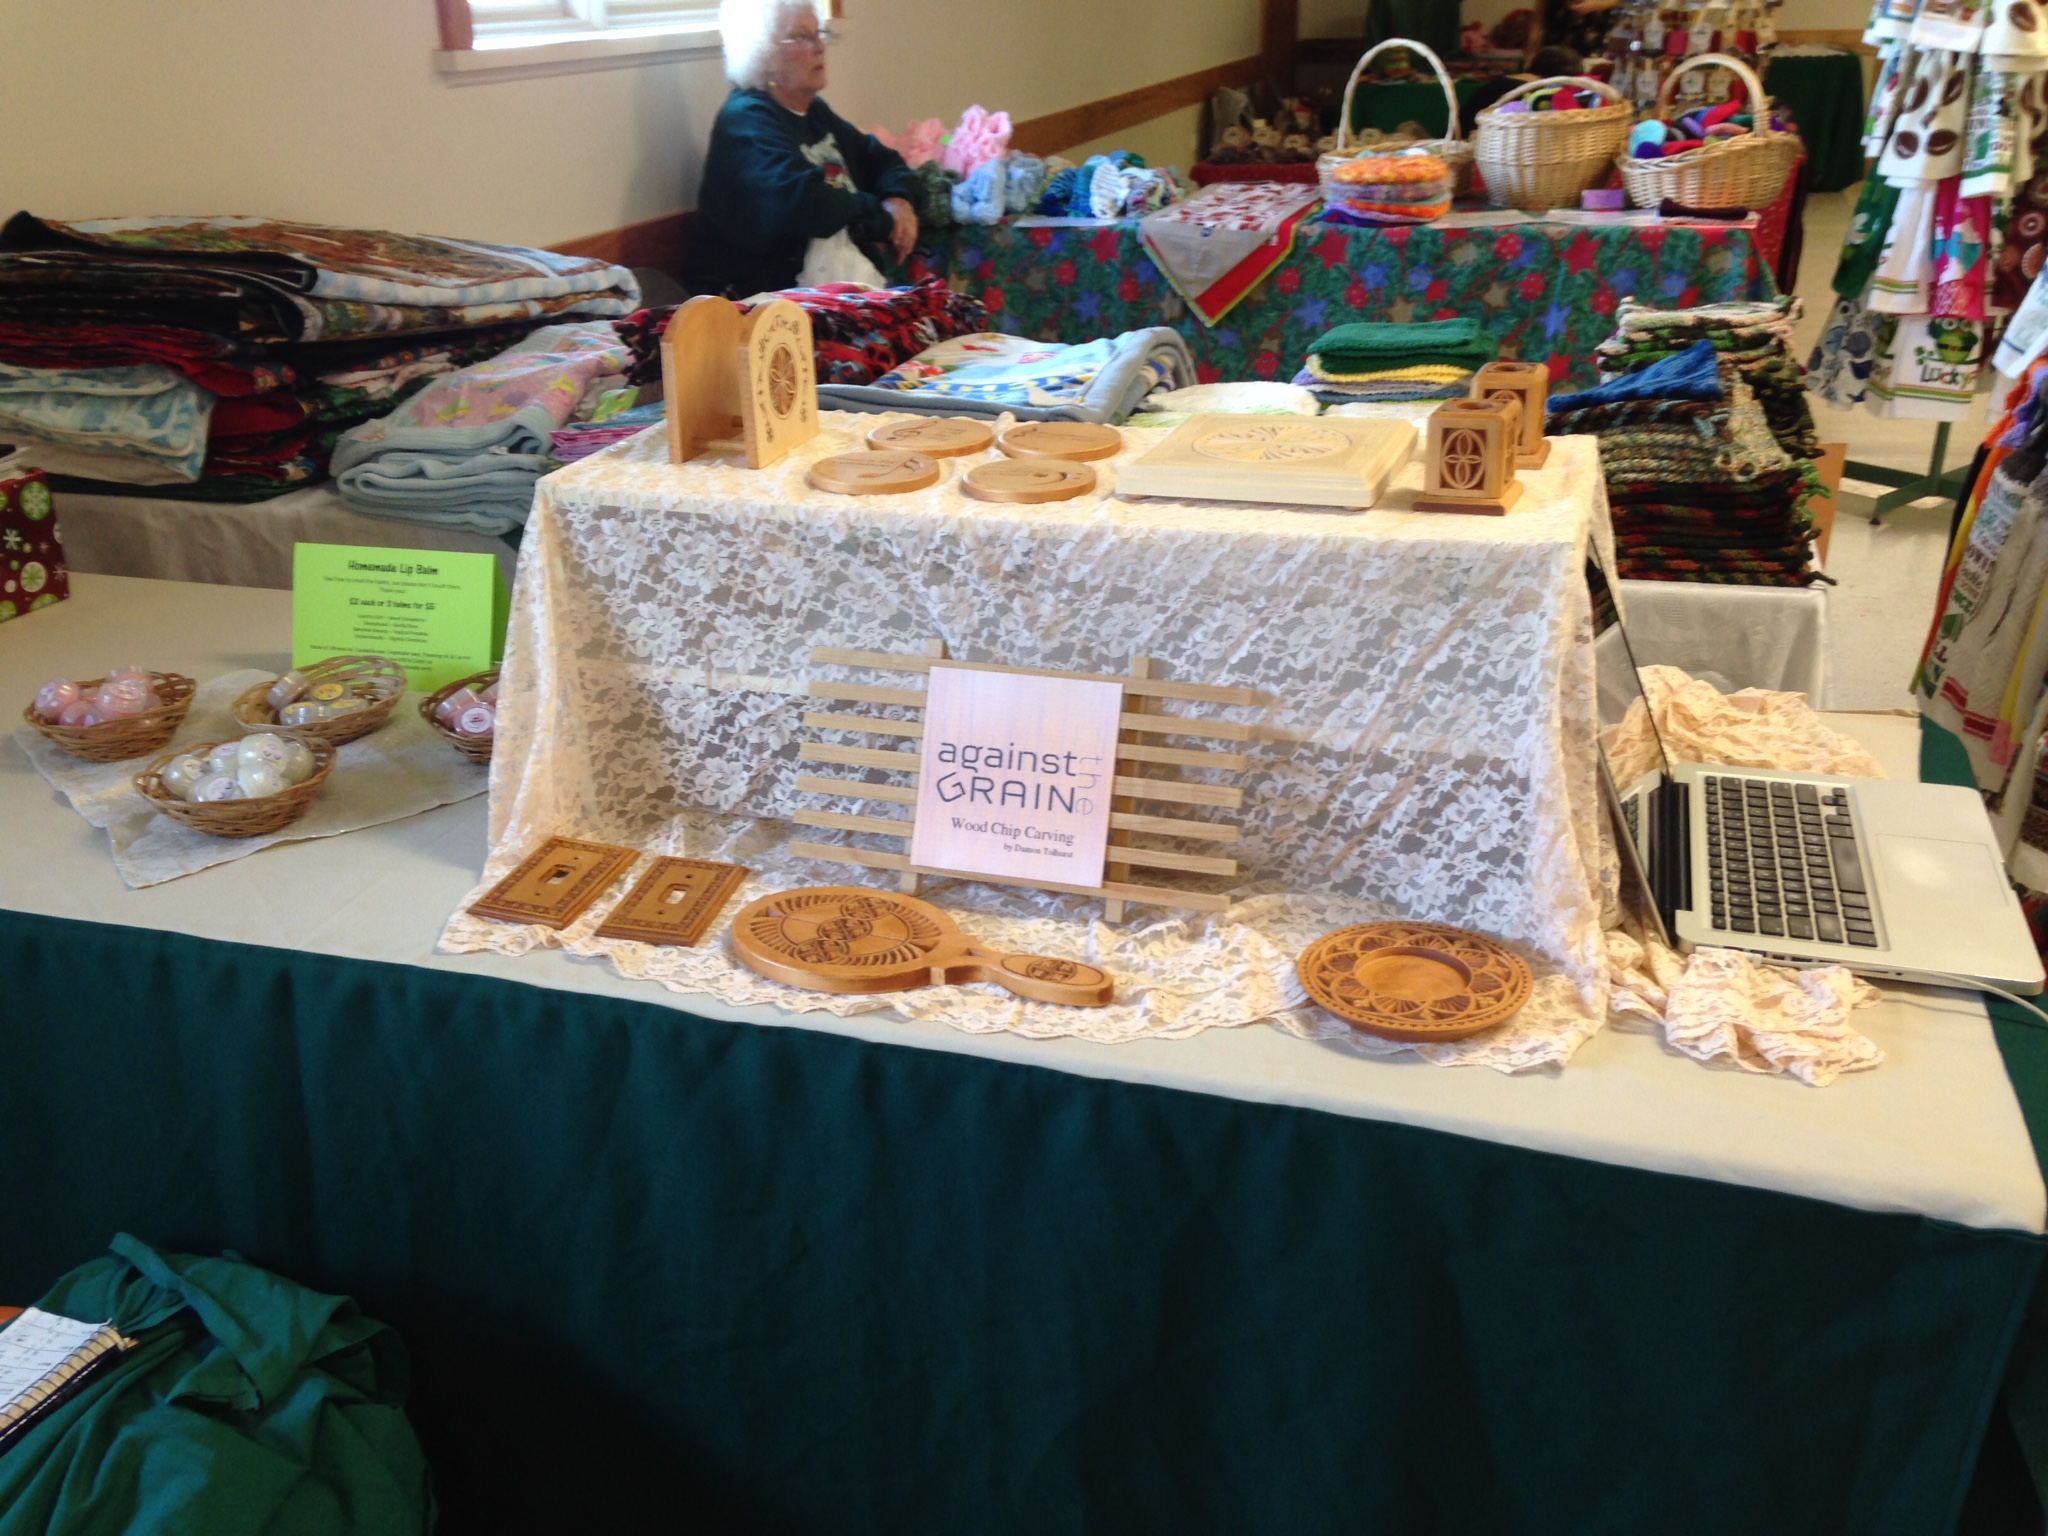 The Against the Grain Chip Carvings display at the Conklin craft sale. |