 A rose that I carved for my now-wife.
MY WOODCARVING JOURNEY
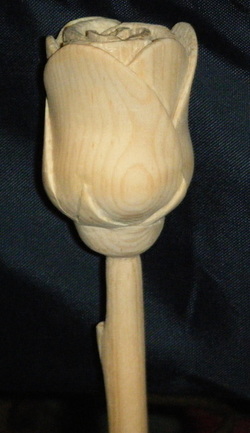
I discovered the art of wood carving in 2005, and have enjoyed learning to turn a lifeless chunk of wood into a beautiful showpiece ever since. I got into the craft with the more sculptural style, carving figures and trinkets (such as this rose), but I got into the style of chip carving after receiving a starter kit as a gift. This style of carving has proven to be a very good fit for my personality and interests, requiring patience and a keen eye for detail. After spending the first few months getting acquainted with the tools and techniques of this new style of carving, I ventured into making real pieces, giving most of them away as gifts. It didn't take long, however, to realize that this could only go on so long before my own home and the homes of friends and family would be more-than-suitably stocked with chip carved pieces. So the next step was to start selling my carvings -- and here we are. This gives me the best of both worlds: I can continue with my hobby of chip carving...without having my own home bursting with carvings at every turn. My goal isn't really to make money -- selling my pieces just provides the funding (and justification) to continue carving beyond what I give away.
Wood carving is a great hobby of mine, but I do have a full-time job as a user experience designer in Midland, MI. I don't know if it will ever become anything more than a hobby, but I sure enjoy the process right now, and I'm happy to be able to share my hobby and the beauty of chip carving with others.
- Damon Tolhurst
HOW IT'S DONE
Here's a brief outline of the process, and you can see it in action on my YouTube channel. All pieces are carved in basswood. Basswood is a typical carving wood because it has a tight, even grain, allowing for smooth cuts and nice detail. I don't have the resources to make all of the items myself, so I purchase the wood pieces already formed and then add the carving. Once I have a piece ready to carve, the process starts by finding or creating a design based on my or the customer's desire. Creating a new design is generally done on the computer using basic photo editing software. Some rare occasions involve hand-drawing the pattern on the wood, but using the computer allows for more even and reproducible designs. Once the pattern is set, I print it out and transfer it to the wood for carving.
Here's a brief outline of the process, and you can see it in action on my YouTube channel. All pieces are carved in basswood. Basswood is a typical carving wood because it has a tight, even grain, allowing for smooth cuts and nice detail. I don't have the resources to make all of the items myself, so I purchase the wood pieces already formed and then add the carving. Once I have a piece ready to carve, the process starts by finding or creating a design based on my or the customer's desire. Creating a new design is generally done on the computer using basic photo editing software. Some rare occasions involve hand-drawing the pattern on the wood, but using the computer allows for more even and reproducible designs. Once the pattern is set, I print it out and transfer it to the wood for carving.
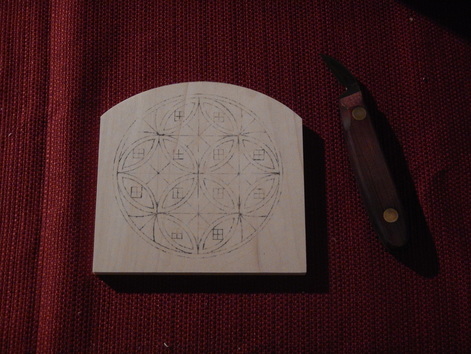
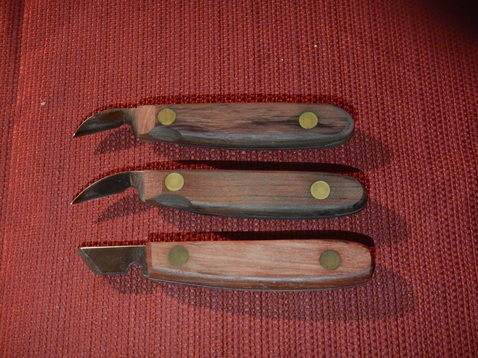
My chip carving toolbox has three knives in it: one for straight lines or gentle curves, one for more tightly curved lines, and the last one is just for adding some fine detail work. Most pieces use only the first or second knife. There are no other machines or tools used in the carving process besides my hand and one of the three knives listed.
Then it's just me and the knife. It's all just done by tracing the blade of the knife around the lines. A wider distance between two lines means pressing the knife deeper into the wood toward that bottom point where the edges meet.
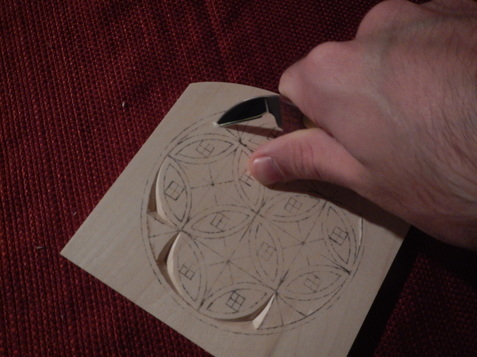
Once the outline of a piece have been cut, it just kind of pops right out. This little chunk is the "chip" in chip carving.
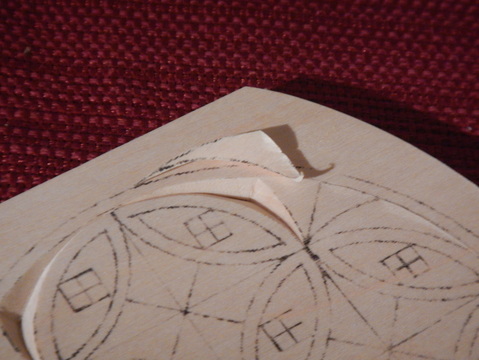
Once carving is completed, I use an eraser to remove any remnants of the pattern that didn't get carved away.
|
|
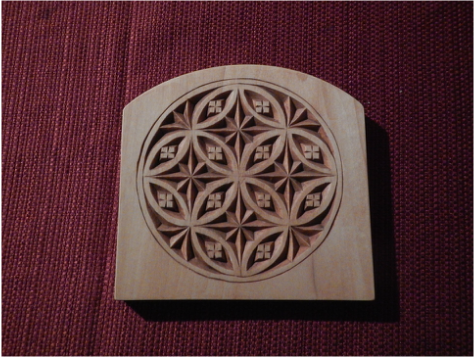
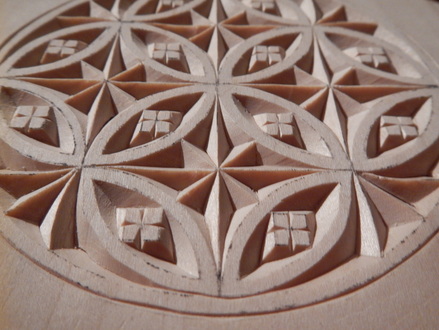
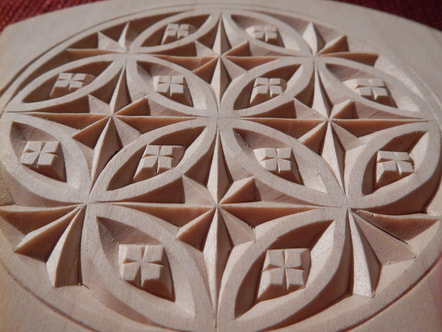
Then the surface is sanded, never the carved parts. At this point, the piece is ready for the finish. All finishes start with a sanding sealer. This helps seal the wood for durability and even staining (if stain is to be applied). For an unstained piece, a couple coats of spray lacquer finish is applied and it's done. For a full-stain finish, a gel stain is applied to the entire piece before lacquer. For the high-contrast finishes, I either stain the whole piece and sand the surface (for the rustic look) or only stain the carved recesses (for the cleaner look). Once the lacquer is applied, the piece is ready to go.